Digital Planning Basics
How to Add Page Inserts to your Digital Planner

Feb
Follow us on
Estimated reading time: 17 minutes
Adding a page Insert can be really helpful as it can provide additional functionality to your planner while at the same time using the planner’s own hyperlinked pages. For instance, you can duplicate a blank page in your planner and add any insert you wish. You can go one step further and duplicate the page with your insert and add it to your templates section. Let’s back up a bit and talk about how to add an insert to your planner.
Adding an Insert to your Planner
Adding an insert to your planner is like adding or changing a section header or divider.
Actually, it is almost exactly the same.
At Beading Treasures our inserts are PNG files. This allows for the planner’s background to show through.
You can use any image file you want though.
Here we are using the Pattern Planner in landscape orientation (the Pattern Planner comes in both Landscape and portrait orientations in one download package.
How to add Page Inserts PNGs to your Digital Planner
- Start by duplicating a blank planner page in the templates section. This is usually made available in all Beading Treasures Planners. And then go to where you would like to insert the new blank page

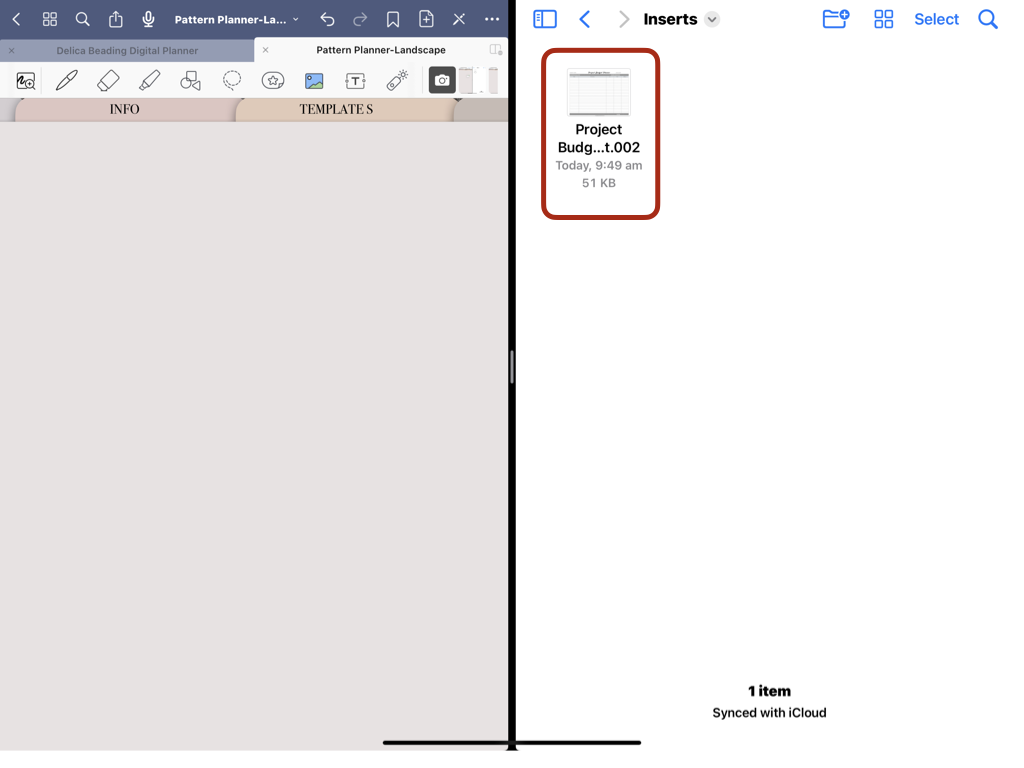
- Open the folder containing the individual PNGs you want to import
Do this by using a split screen with the GoodNotes and the Files apps open side-by-side. Tap on the three dots at the top of the screen and find your file app related to where you have stored or downloaded the PNG or image file.
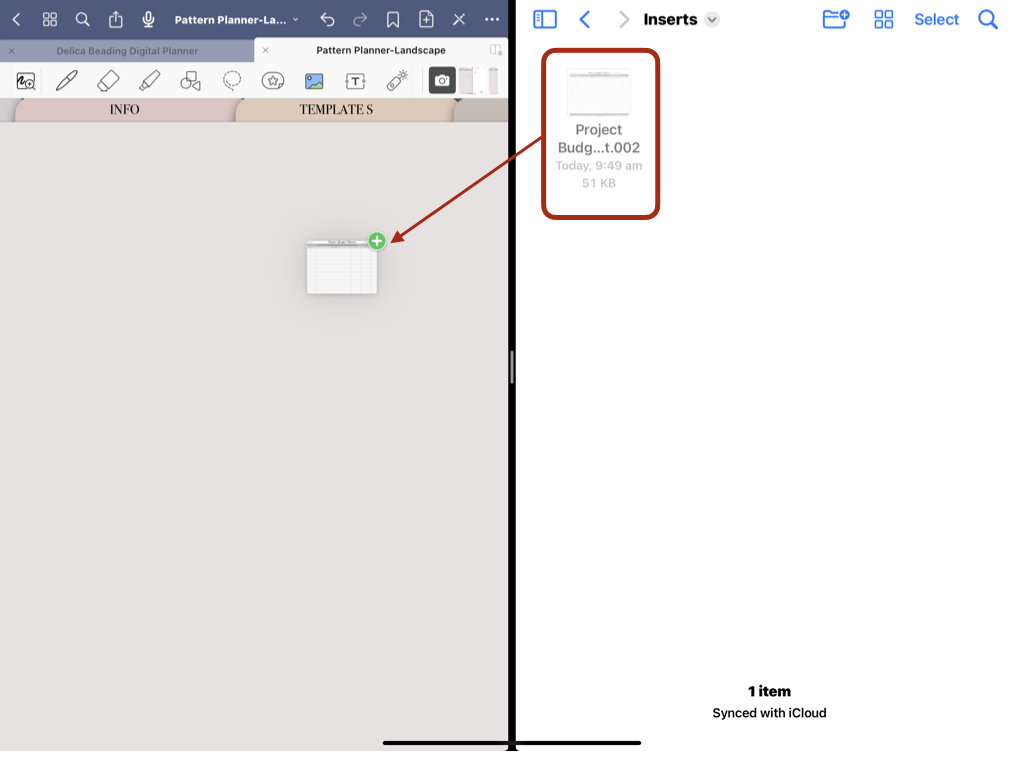
- Hold down and drag the Insert over to the desired GoodNotes page
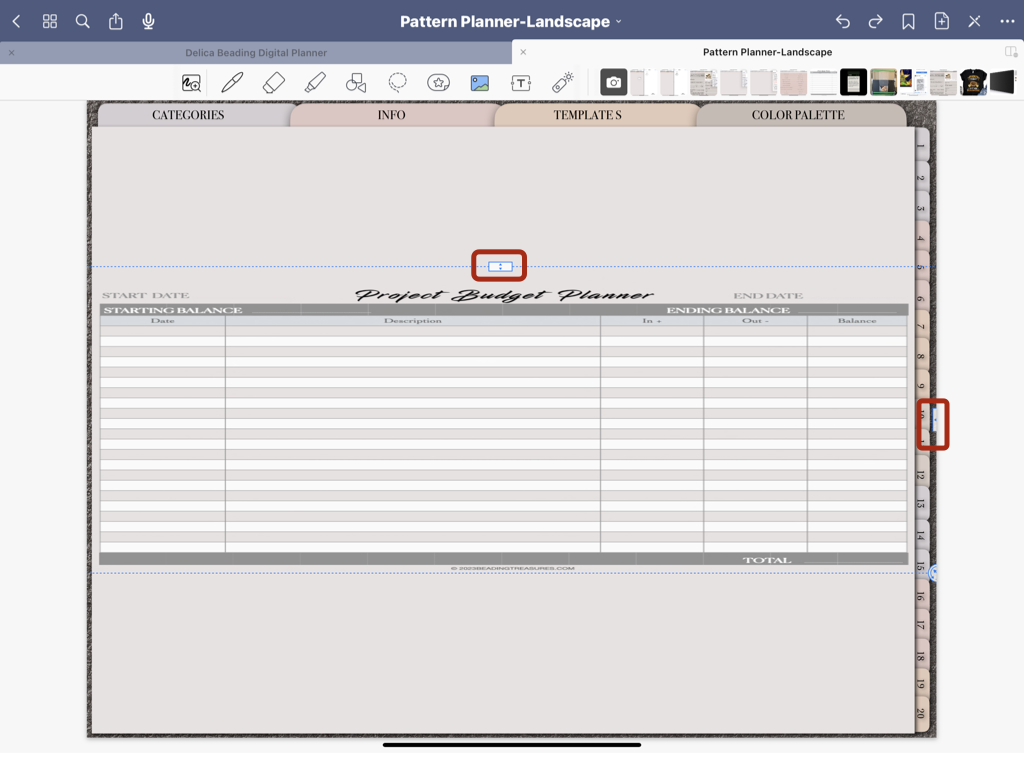
- Swipe the side of the GoodNotes Screen all the way to the opposite end to enlarge the screen to make it easier for the next step
- Center the PNG image you just dragged over in the middle of the screen to make the enlarging of the image less fiddly as the image will enlarge on both sides at the same time.
- Resize and arrange your Page Insert so that it covers the whole page.
with the arrows on the top and the right-hand side.You should now have a new page with all the tabs’ hyperlinks working.
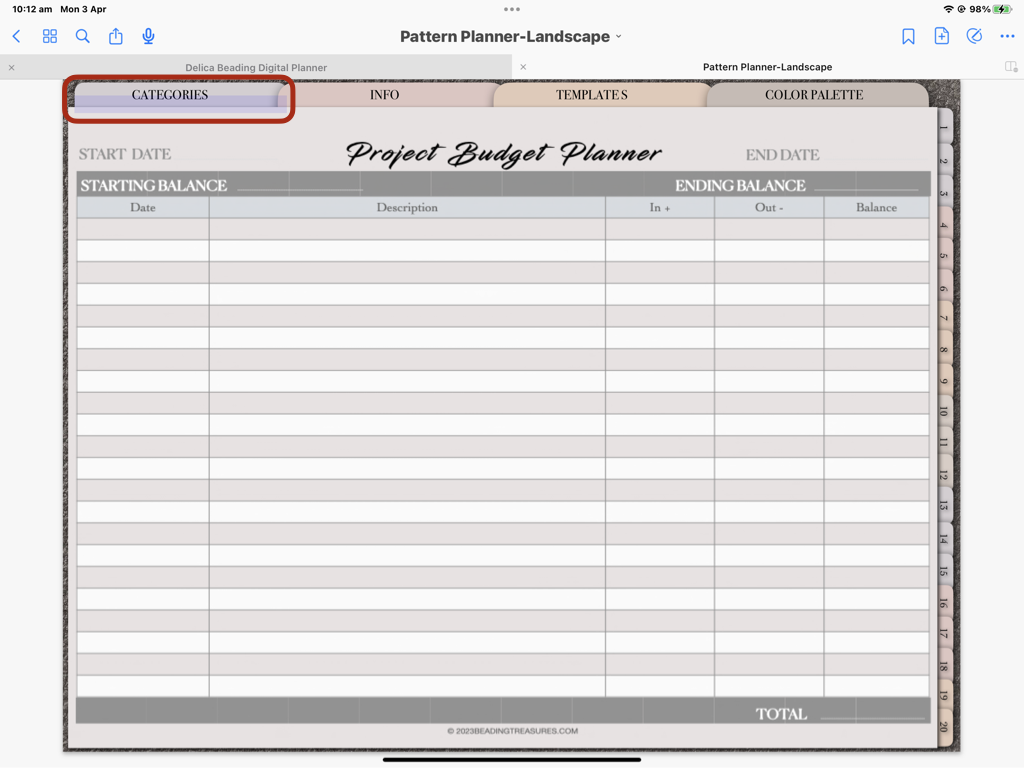
- You should now have a new planner page with your insert on it and all the hyperlinks and functionality of the planner working from that page.
The highlighted category Tab in step 6 is an indication that the tabs are working.


What Inserts Would you Like?
We have inserts that we are currently working on such as
- Bead Order for a Pattern Insert
- Project Budget Planner Insert
Do you have any ideas for inserts you might like? Send me an email at nedal@beadingtreasures.com and let me know
We’ll let you know when these are available in our shop. Signup to stay in the loop!
In Short
Using Page Insert is a wonderful way to add functionality to any digital planner. We will be making more of these to add to the Beading Planner and the Delica Beading Planner, and maybe others. The possibilities are really endless with Page Inserts.
Remember to duplicate the page with the insert and add it to the template section of your planner so that you can reuse it again and again!
Happy Planning
If you enjoyed this post…
You might also like to read these pages too:
Latest Blogs
lATEST POSTS

Best Thread Color to Use with your Patterns
What is the best thread and thread color to use for weaving your bead tapestry?
Dec

Best Way to Weigh Your Beads
How best to go about weighing the beads in your stash before purchasing more for[...]
Dec

How BT is Helping You to Weave Large Bead Loom Tapestries
All things beading, bead looming large tapestries and digital planning for beaders.
Mar


Hi there! I’m Nedal.
I created Beading Treasures to make information about beading large tapestries more accessible, and in doing so encouraging creating of this amazing art form.
Weaving big can seem intimidating but by using some techniques it is totally doable, no more than that it is really enjoyable!
If you’ve found this blog helpful, please support me by choosing the affiliate products on my blog and following me on my social platforms.
Don’t forget to check out the shop.
Thank you!
Nedal Douaihy, Artist & Founder