Digital Planning Basics
How to use your Digital Line Guide
Feb
Follow us on
Estimated reading time: 19 minutes
This post is about how to use the Digital Line Guides (DLGs) that we have already imported into GoodNotes as a widget, it will also cover the best way to mark your progress on a pattern.
Here are the links to learn more about the DLGs if you are not ready to use them yet in. your patterns.
Here is how to use them.
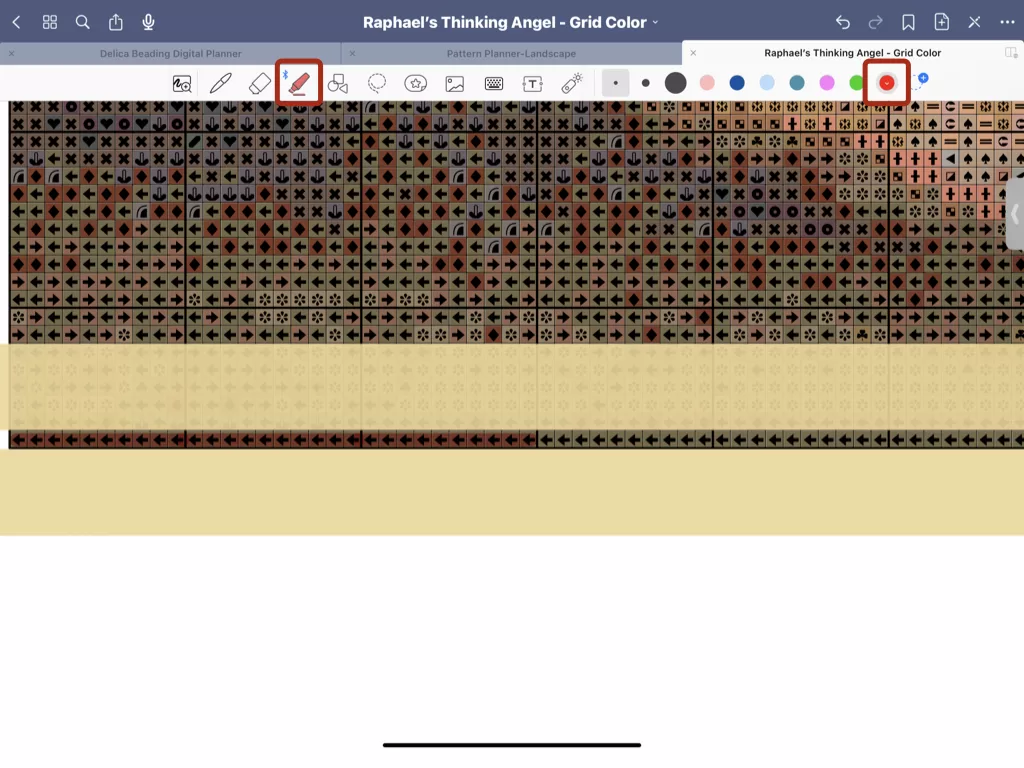
How to position your Digital Line Guide (DLG) on your pattern
Digital Line Guides are essentially rulers. These rulers help you stay on track while weaving your bead tapestries. DLGs can be used for any type of pattern that requires reading linearly, line by line.
Digital Line Guides or DLGs for short can be placed anywhere on your pattern and adjusted to the line size or the row size of that pattern. This is not as important in wordcharts but when working from a grid pattern it makes a huge difference.
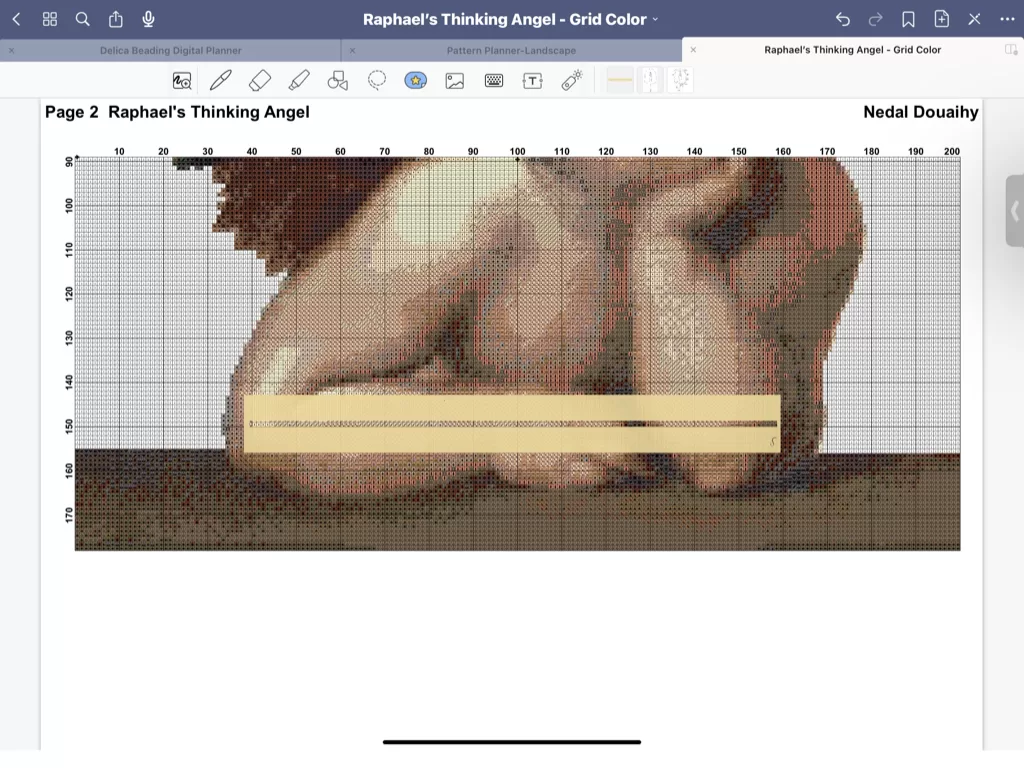
This is an example of a bead weaving pattern, where the weaving starts at the bottom and works progressively to the top. So the DLG will be moving up. You can see the progress has been marked by crossing off the beads as they are loaded on the weft thread.
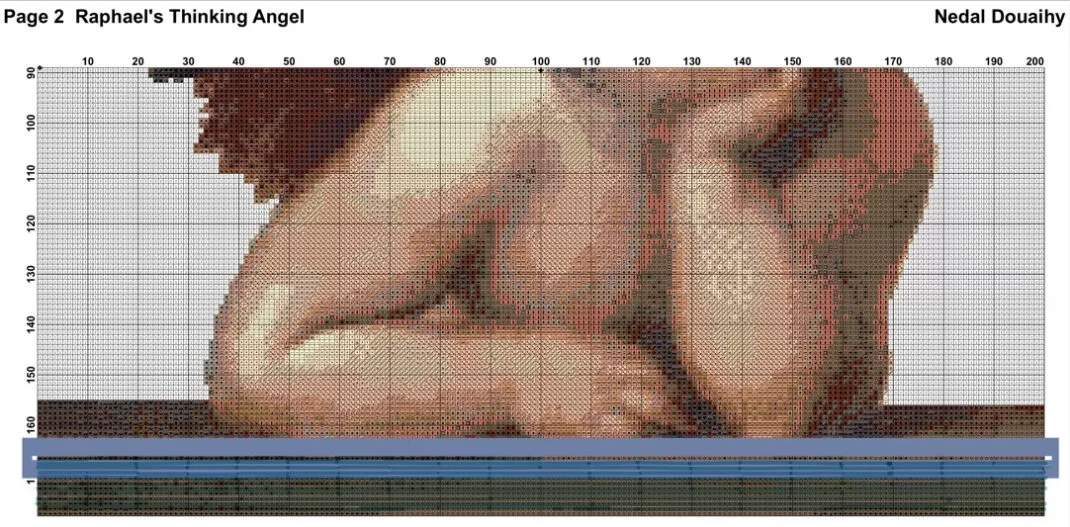
Using the DLG you can mark off your lines one by one, paying scant attention to the faulty pesky row numbers at the edge. No matter where you start in your grid or wordchart.
They are available in 2 types:
Opaque: For when you want to see only the line you are working from.
Transparent: For when you want to see the adjacent lines (on the top and bottom) to orient yourself and to check your work as you go.
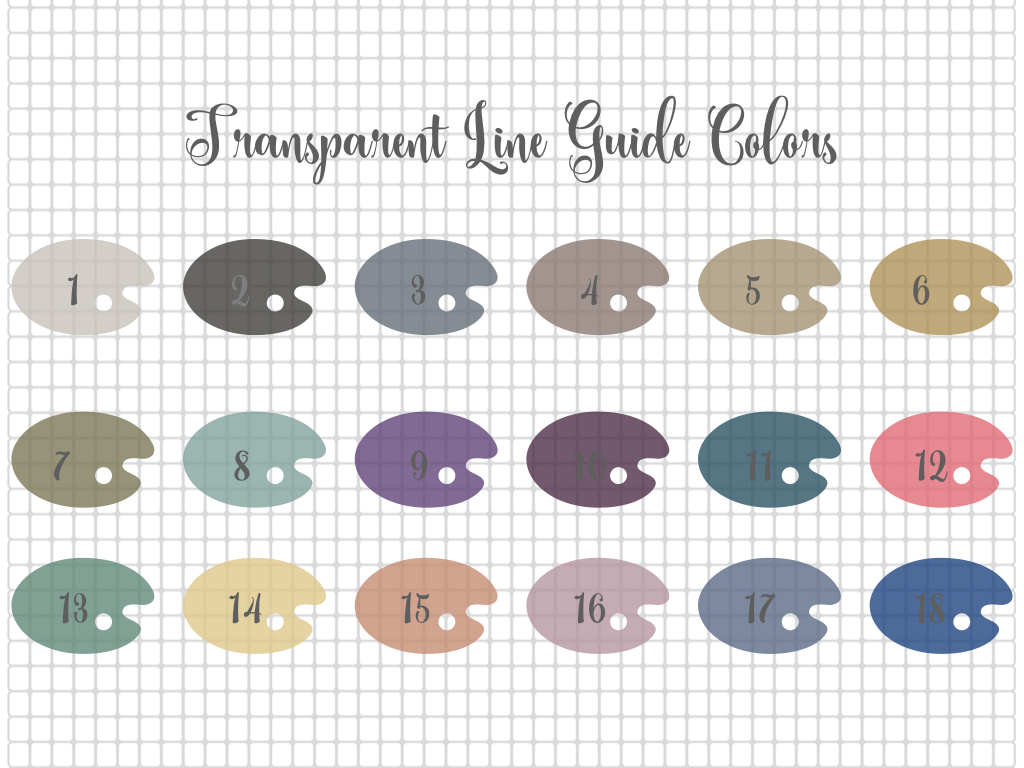
Both come in 18 different colors for you to choose from.
In this example, we are using Color Number 14 – Pancake in Transparent.
Digital Line Guides (DLGs) Sizes
Every Digital Line Guide comes in 3 different sizes, meaning the height of the window in the middle where your pattern shows through can be small, medium, or large. This all depends on what pattern you will be using and how high the single line is.
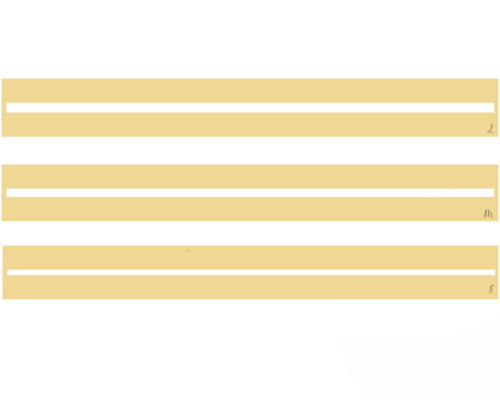
The size of the DLG is noted on the bottom right.
L for Large window
M for Medium window
S for Small window
You can further adjust all of the DLGs in the pdf Annotation app itself to fit the pattern you are using. You can adjust the height to make the window larger and the width so that the whole line in the pattern shows.
To minimize the need for doing this, however, select the line guide size that best fits your pattern.
Since the lines in the grid here are thin, we will be using the DLG marked with an S for small in the bottom right.
Adding the DLGs into GoodNotes
If you haven’t imported your line guides into GoodNotes, refer to the blog linked below which shows you how to do that. Once imported into your ELEMENTS library, you can use them for all of your patterns in the size that you need.
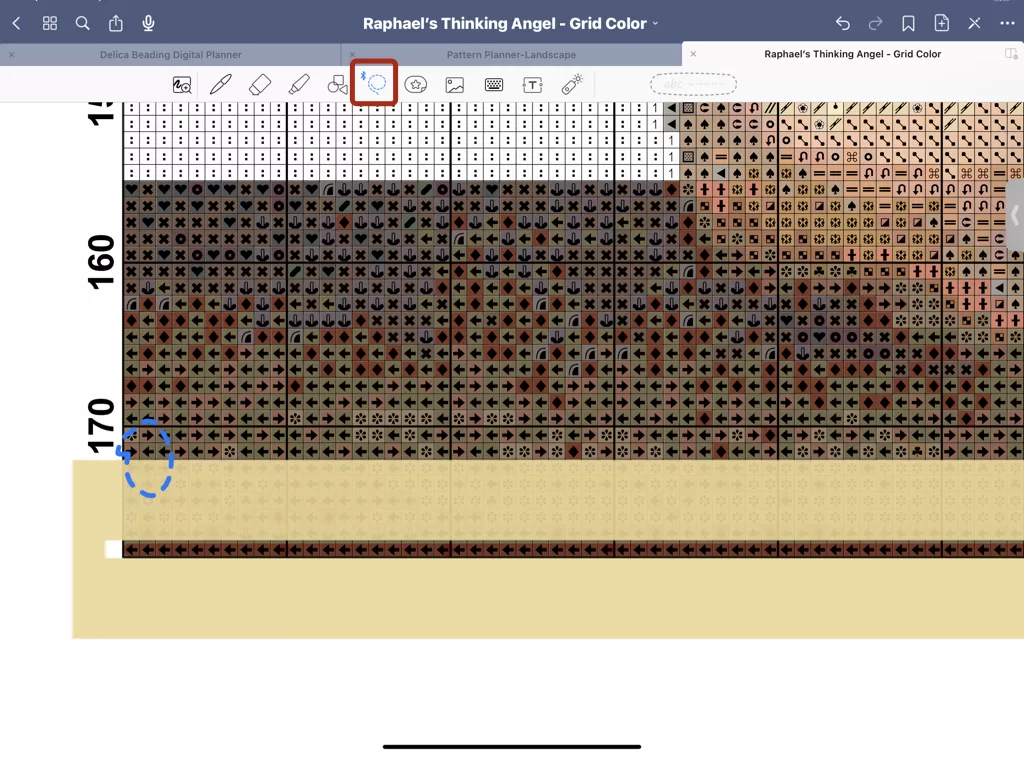
How to Position Your Digital Line Guide on Your Pattern and Use it
Here is the easiest way to position your Digital Line Guide (DLG) in the correct place and size on your pattern and move it as you progress.
- After adding your DLG to the pattern, tap anywhere but the DLG to deselect it

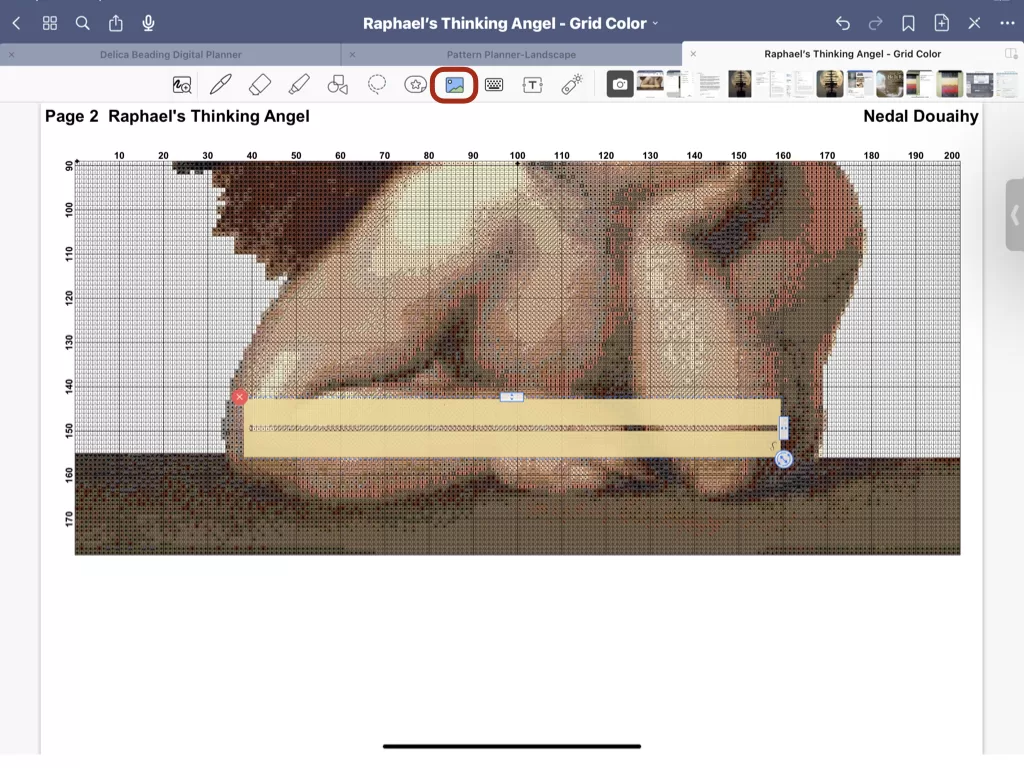
- Tap the IMAGE icon in the top menu then tap the DLG
You should see the controls on the sides of the DLG
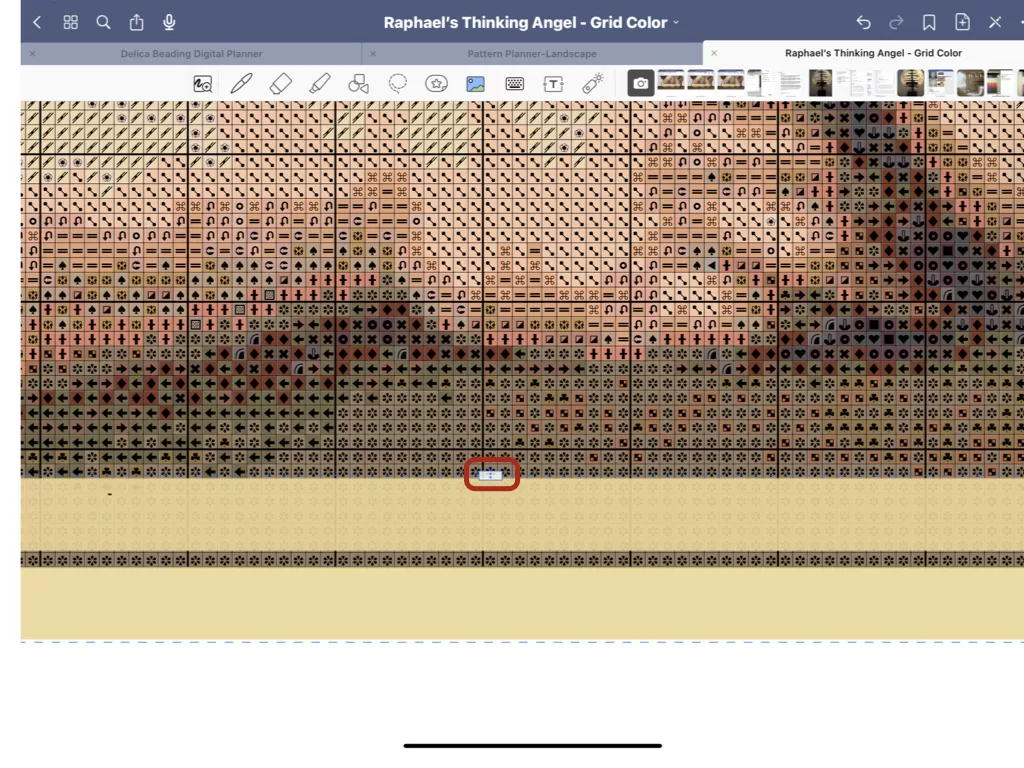
- Drag your DLG to the line in the pattern where you want to start working from, making sure that it is still in the center of the pattern.
- Adjust the height of the window in the middle of the DLG by using the sizing top toggle with the arrows. Zoom in closer if you need to by tapping with your thumb and index finger and while still touching the screen spread them apart. Do the opposite with your fingers to zoom back out.
- Centre your DLG again, making sure that you are still on your designated line and that the pattern line is clearly visible. Zoom in and out to help you do this.
Adjust the width with the side toggle if you need to.
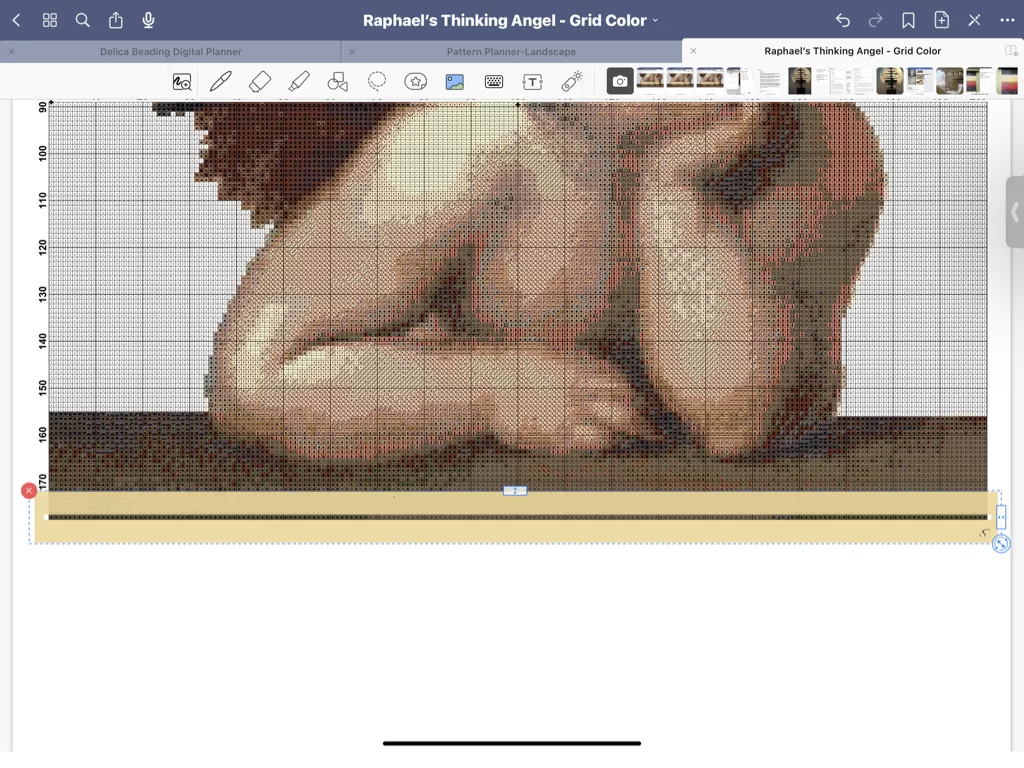
- Tap on the screen anywhere but on the DLG, and your DLG is ready to be used.
- Select the HIGHLIGHTER from the menu bar and choose the color you wish to use
The highlighter is transparent and allows you to mark your progress but still see the previous beads on the pattern.
- Zoom in as much as you wish and mark off your progress as you go
When marking your progress, hold at the end and the highlighter line will straighten automatically.
- Press and hold on the Lasso too and toggle everything off except for images.
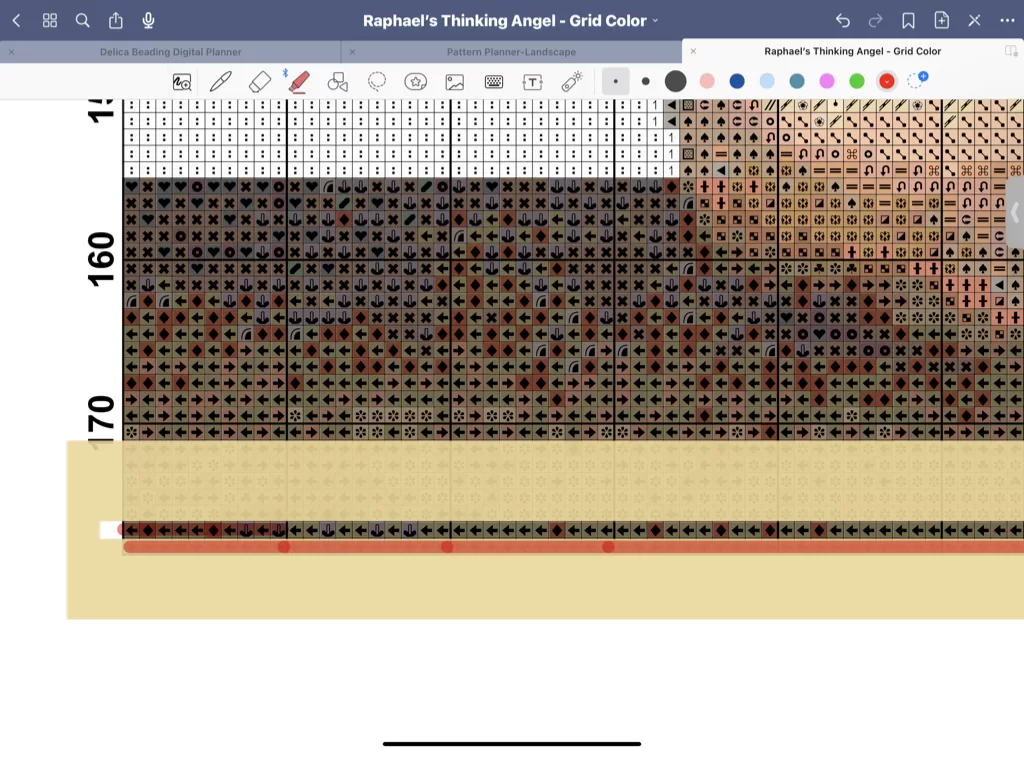
- To move your DLG, go to the start of your next line, and select the LASSO tool from the edit menu. Make sure your next line is visible, zoom in if you need to. Use the lasso tool with your Apple Pencil to lasso or select a small portion of the DLG, no need to select it all.
- Then using your Apple Pencil tap inside the lasso and hold, and move it slightly to where your next line is and center it so the line is fully visible.
- Select your highlighter again and you are ready to start on your next row.

Starting on a New Pattern Page
Starting on a new page of your pattern with the DLG is easy. Just make sure you are in image mode, select, copy, paste, position, and then select your highlighter, and off you go!
Why we love the DLGs
There are so many reasons! Here is a short list in no particular order.
- Once set up in a pattern, they are easy to move from one row to the next.
- They are magnified with the pattern, allowing for maximum visibility.
- No fiddling around at the end of the pattern line, easily move on to the next with minimum effort.
- Using GoodNotes on the IPad means that the pattern is self-lit, no more straining to see which beads to pick up next.
- The IPads have covers that allow them to stand at an angle best for viewing, so no extra stand is needed.
- No wasting of paper or printer ink.
- The original copy of the pattern can remain intact and duplicated to be reused again.
- Can watch videos while beading with Picture-in-Picture mode streaming on same the screen.
We could go on… but you get the point.
Digital Line Guides are awesome and definitely worth trying out!
If you enjoyed this post…
You might also like to read these posts too:
lATEST POSTS

Best Thread Color to Use with your Patterns
What is the best thread and thread color to use for weaving your bead tapestry?
Dec

Best Way to Weigh Your Beads
How best to go about weighing the beads in your stash before purchasing more for[...]
Dec
How BT is Helping You to Weave Large Bead Loom Tapestries
All things beading, bead looming large tapestries and digital planning for beaders.
Mar

Hi there! I’m Nedal.
I created Beading Treasures to make information about beading large tapestries more accessible, and in doing so encouraging creating of this amazing art form.
Weaving big can seem intimidating but by using some techniques it is totally doable, no more than that it is really enjoyable!
If you’ve found this blog helpful, please support me by choosing the affiliate products on my blog and following me on my social platforms.
Don’t forget to check out the shop.
Thank you!
Nedal Douaihy, Artist & Founder