Informative, Vault Gems
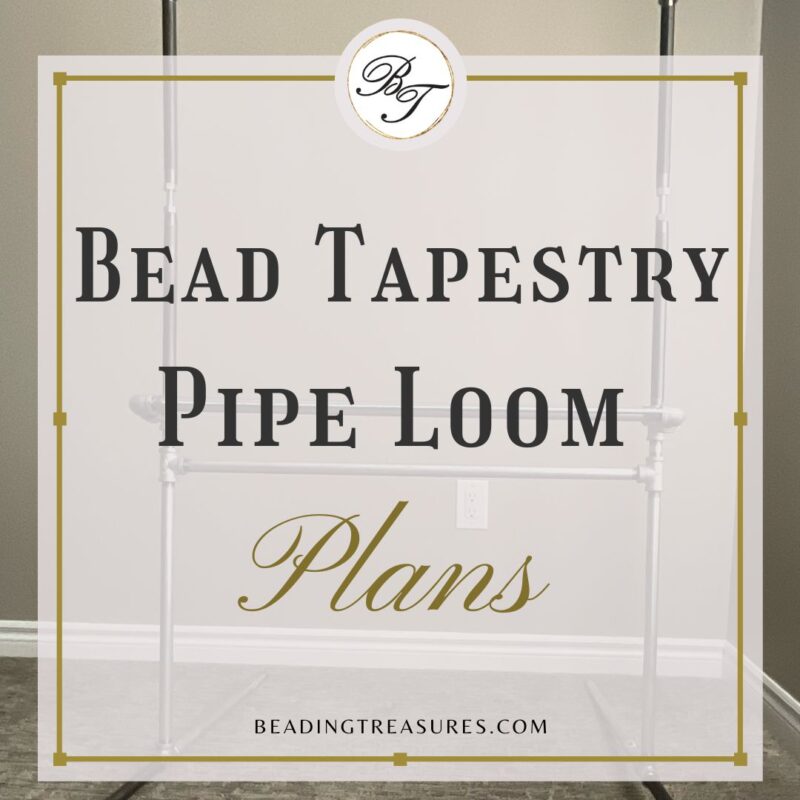
FREE DIY Bead Tapestry Pipe Loom
Nov
Follow us on
I
would like to share with all bead tapestry weavers the modifications that I have added to Archie Brennan’s Black pipe loom plans to convert the fiber tapestry loom into the FREE DIY Bead Tapestry Pipe Loom. The permission granted to me by Susan Martin Maffei enabled me to make these modifications. Archie and Susan were life partners, in Fiber Tapestry Weaving and teaching. I’m thankful for Archie making these plans readily available to everyone, allowing easy access to tapestry looms. I hope that with these modifications to the pipe tapestry loom, the barrier of not having access to larger and better tapestry bead looms will be broken.
But what is this Bead Tapestry Pipe Loom?
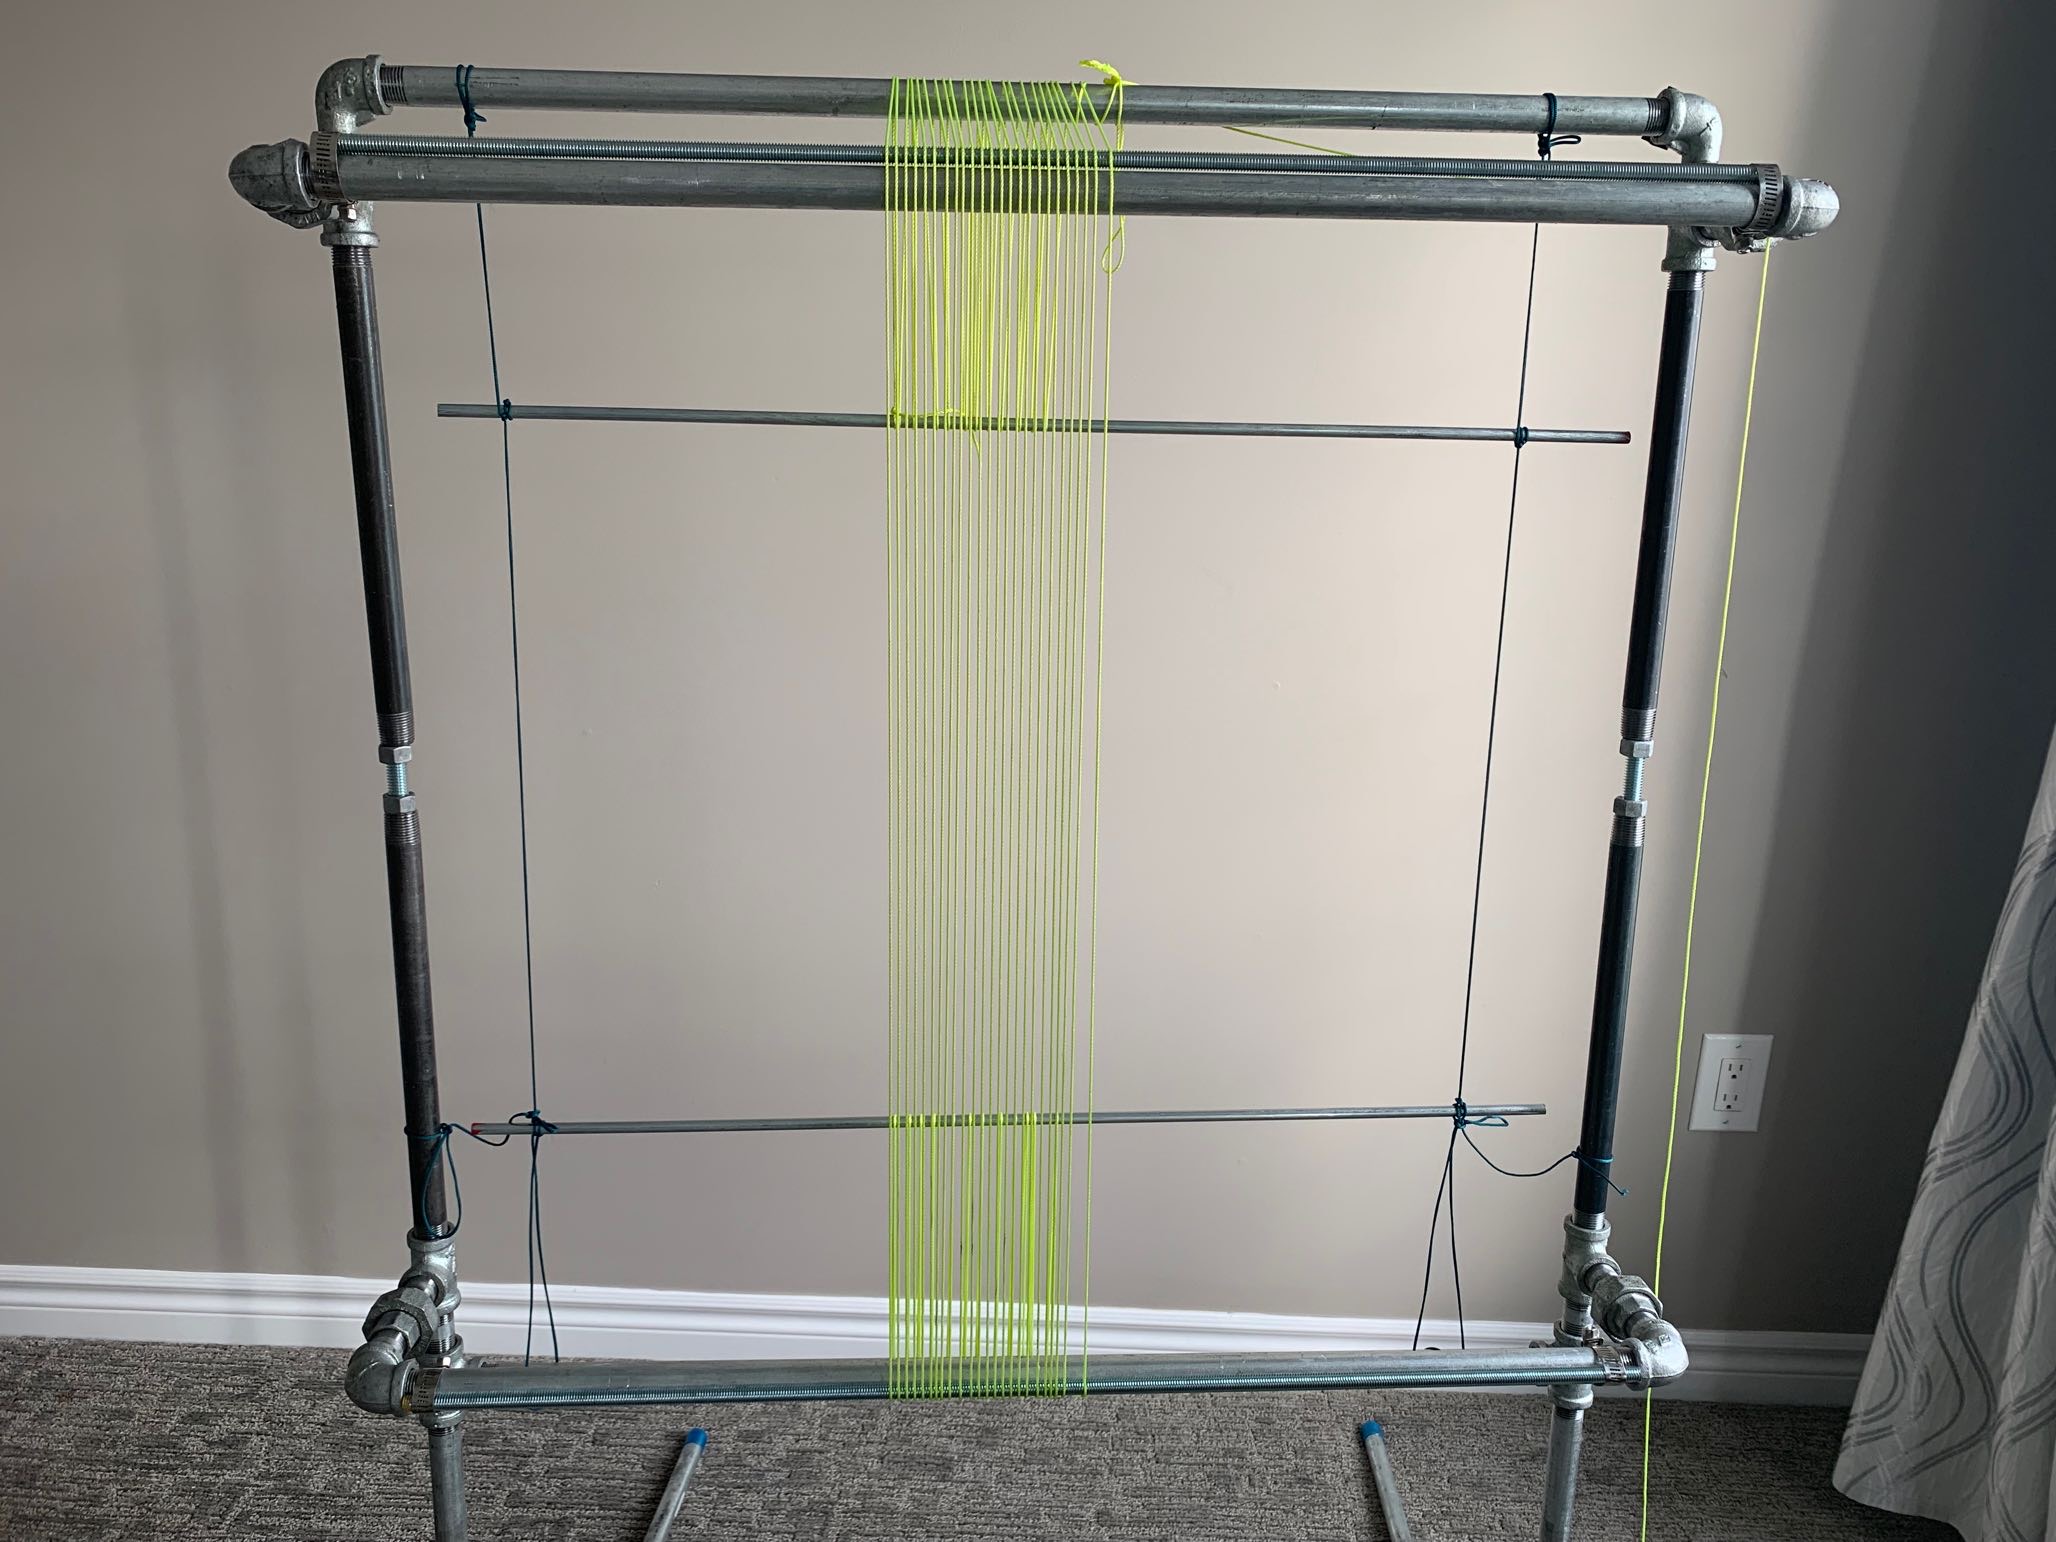
Bead Tapestry Pipe Loom
What is it?
It is a bead loom made up entirely of parts purchased at the hardware store, namely pipes, and fittings that are used in plumbing. No knowledge of plumbing is needed though.
It is easy to put together, and no power tools are required. Just a heavy wrench, a screwdriver, and maybe a metal saw!
Although I must admit, a bit of elbow grease is needed!
The pipe lengths can easily be changed to your preference, for example, if you want a narrower or wider loom. You may also want the warp to be shorter or taller. It is totally up to you.
The best part is that compared to other looms available for purchase, this loom is inexpensive.
Following Archie Brennan’s wishes for his original plans, the plans for the bead tapestry looms will forever be free! They can be downloaded from the VAULT by clicking the button below!
How does the Bead Pipe Loom Differ from the Tapestry Pipe Loom
There are 2 main differences or modifications to the plan that are specific to bead weaving.
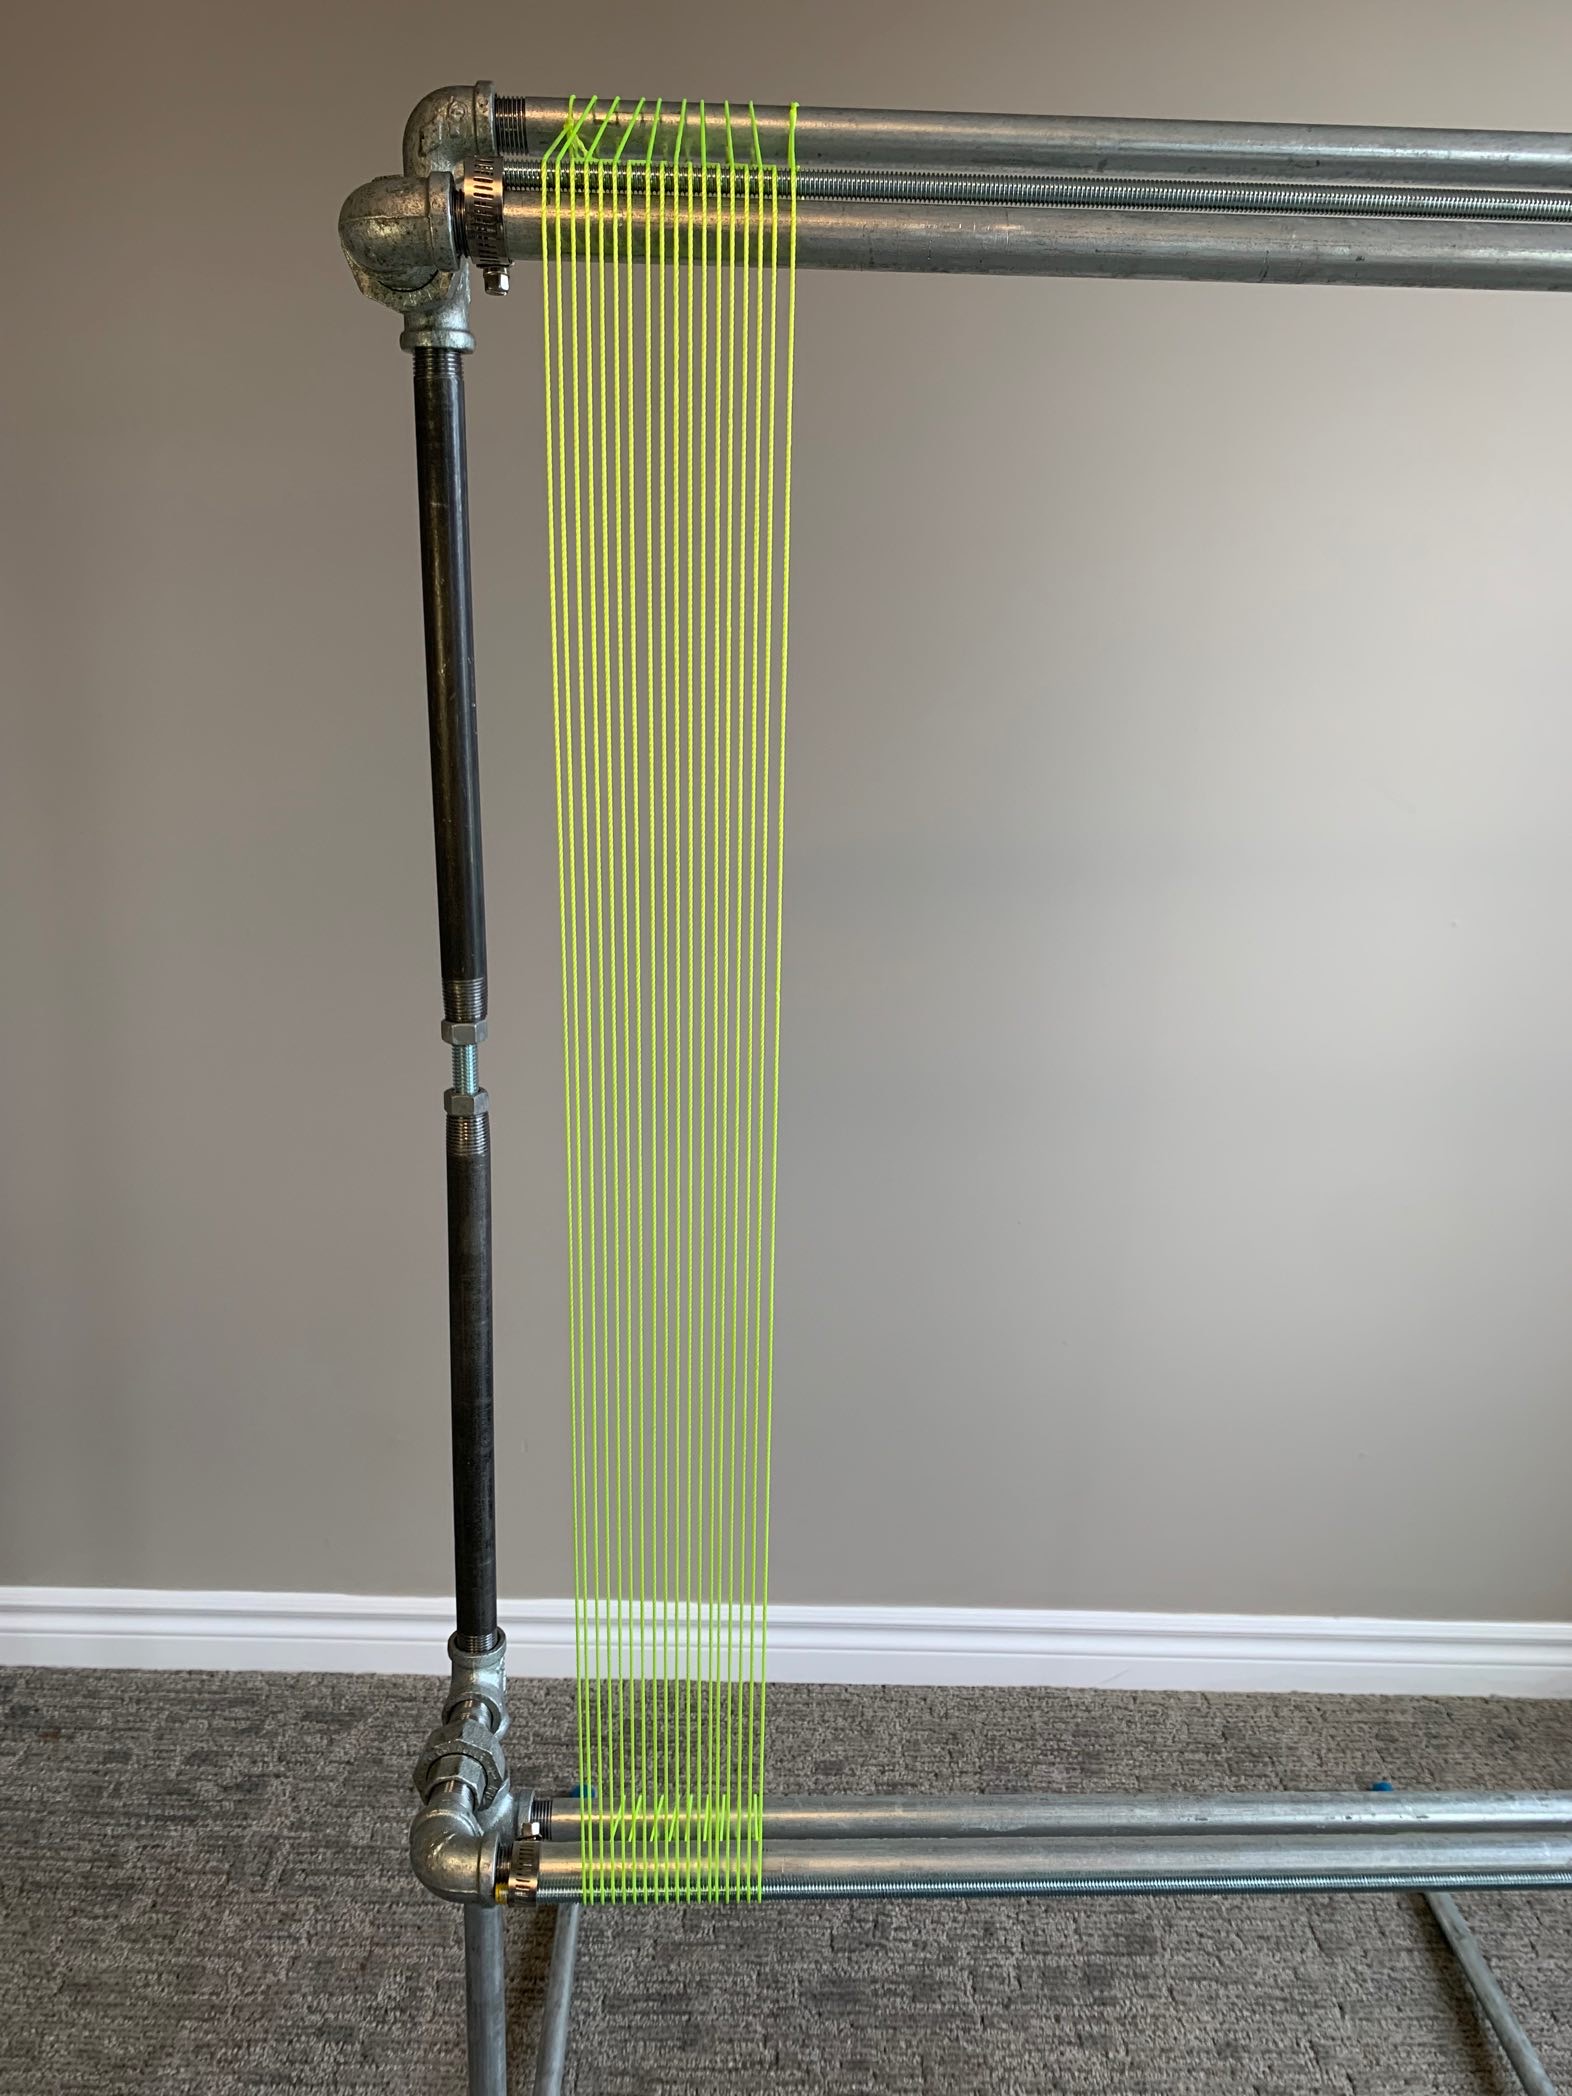
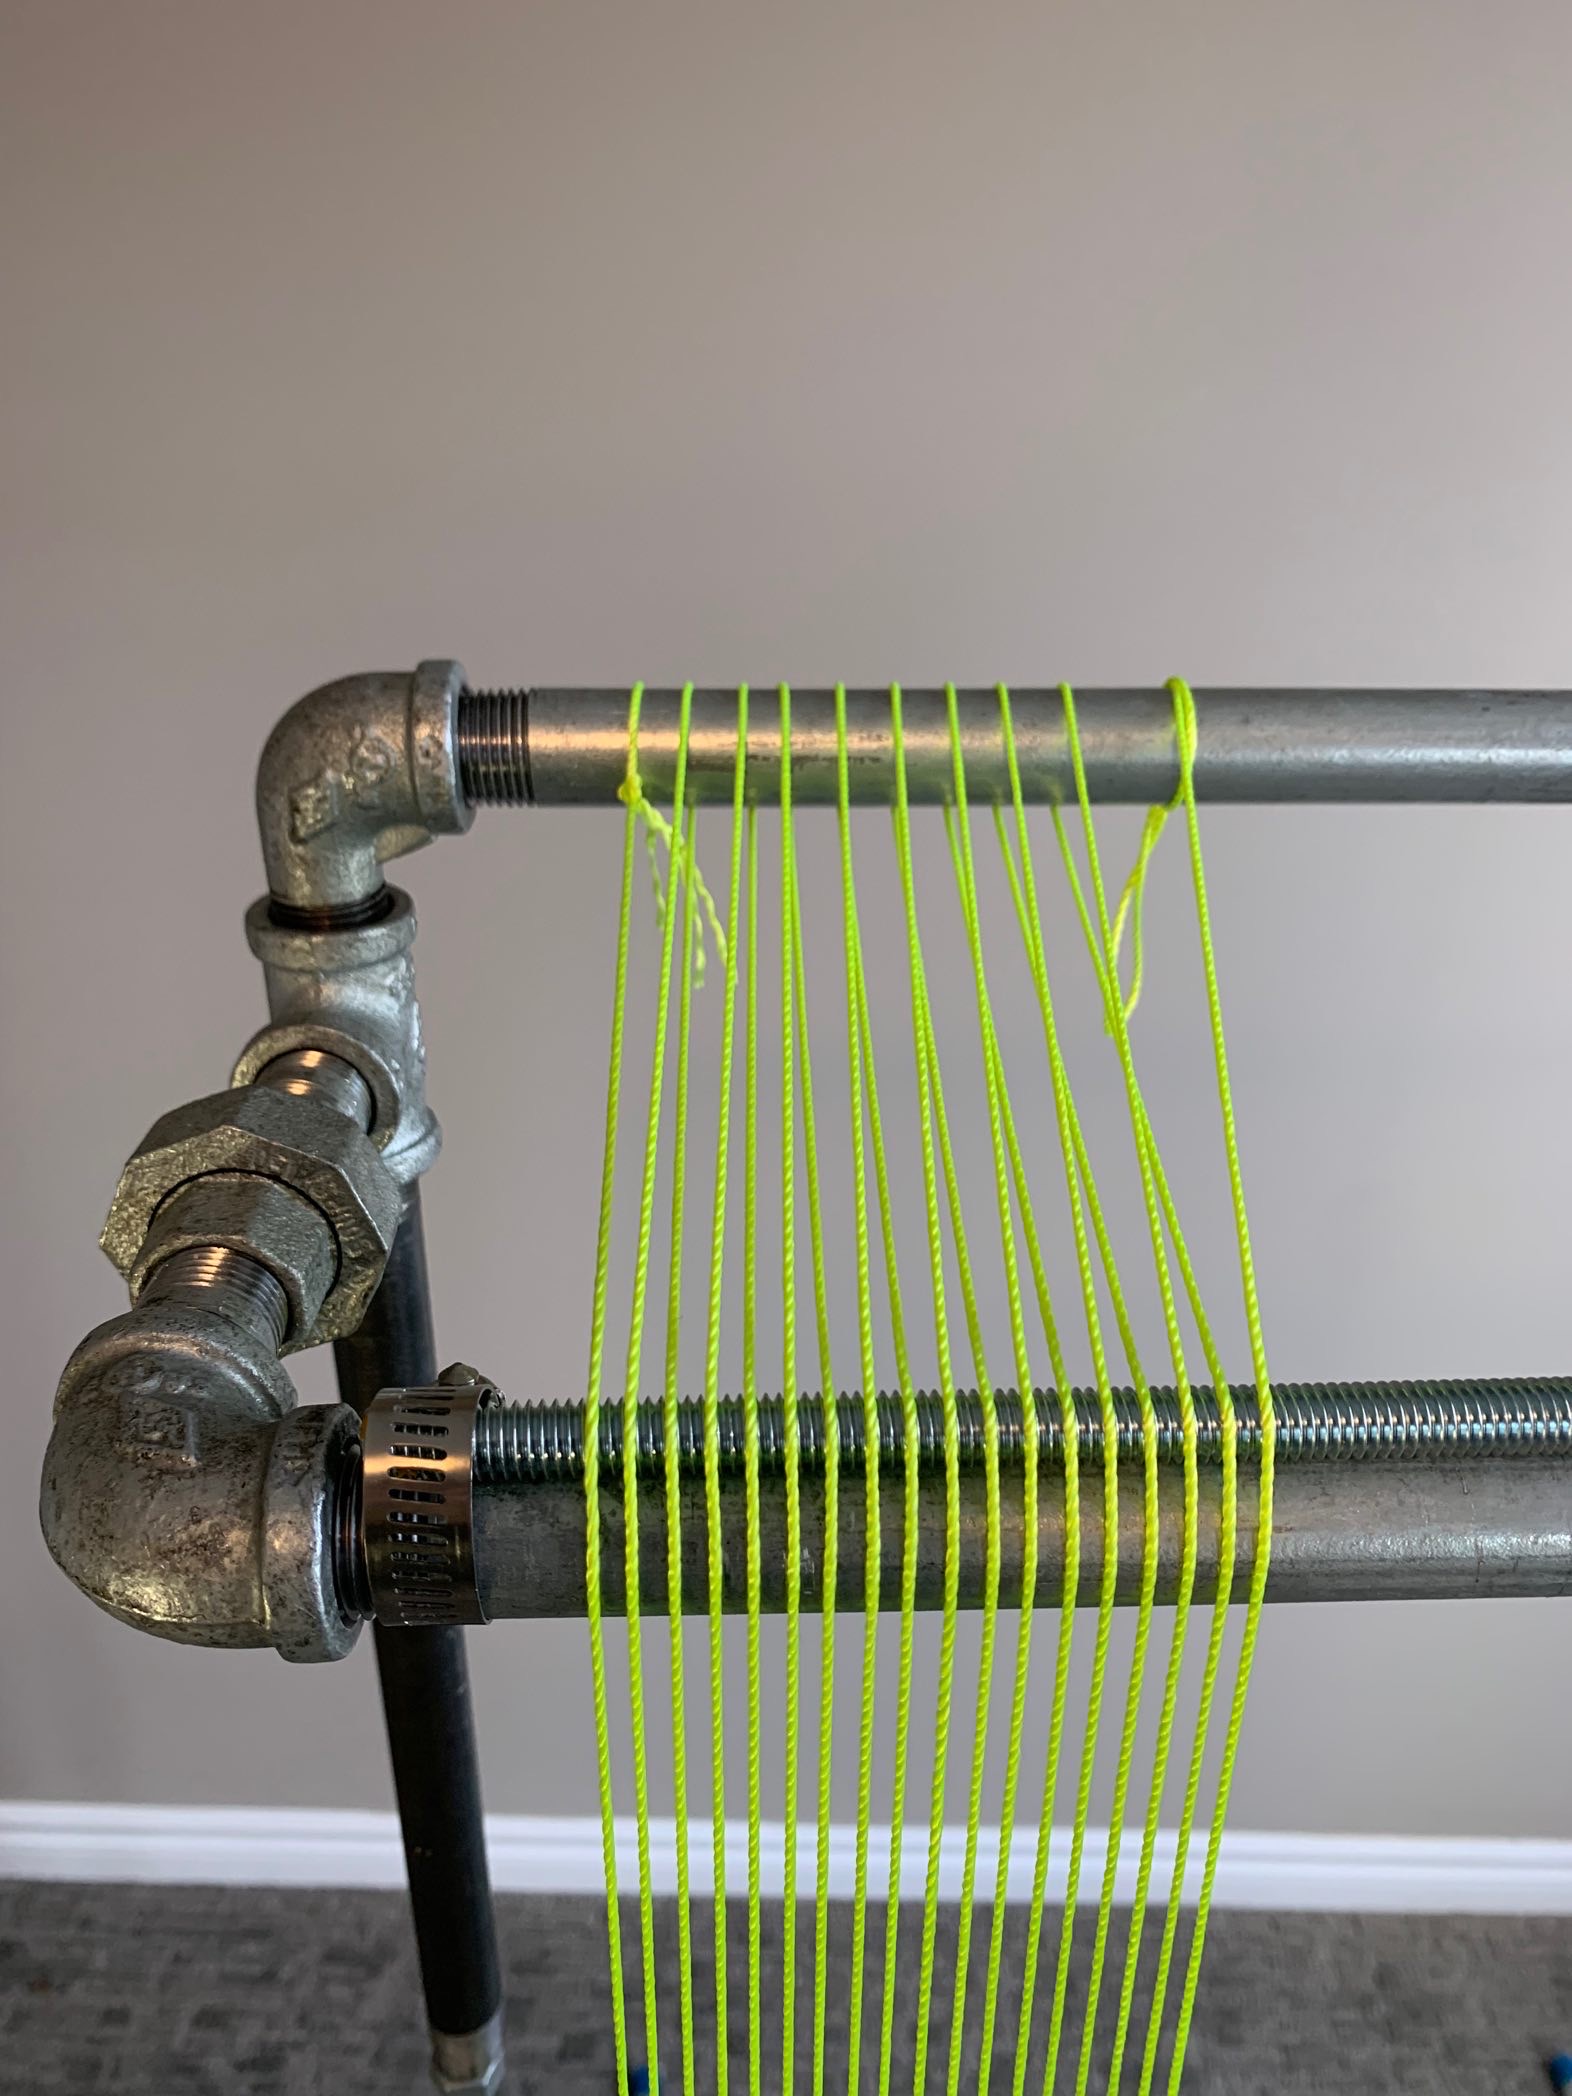
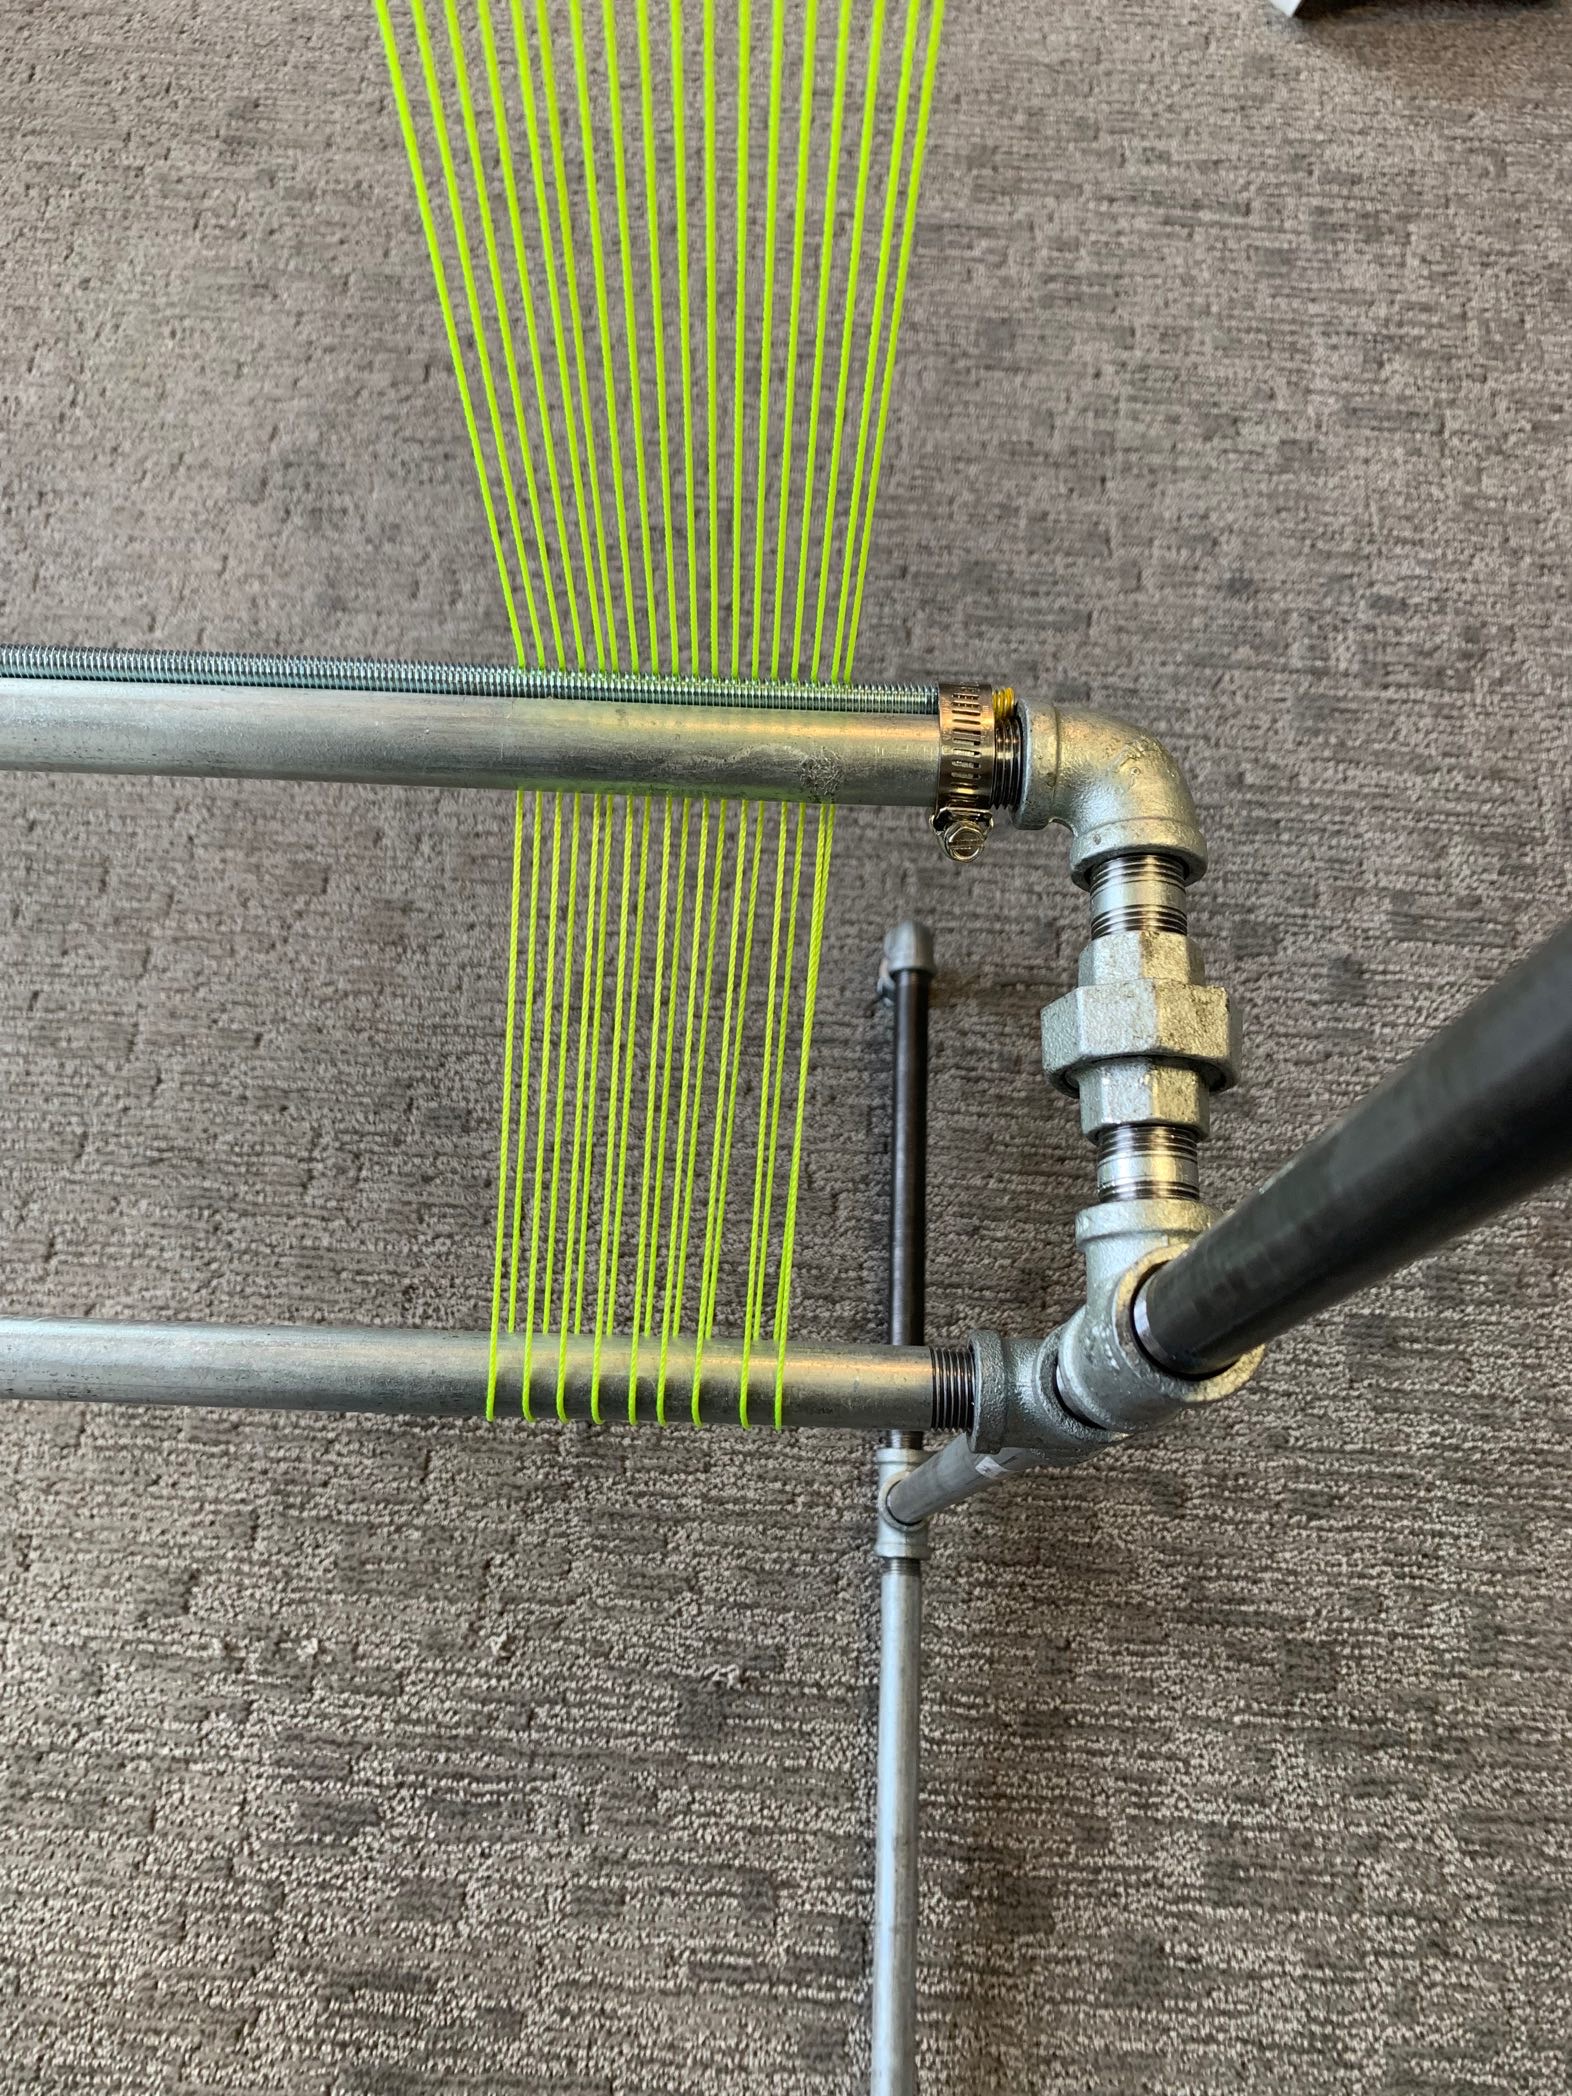
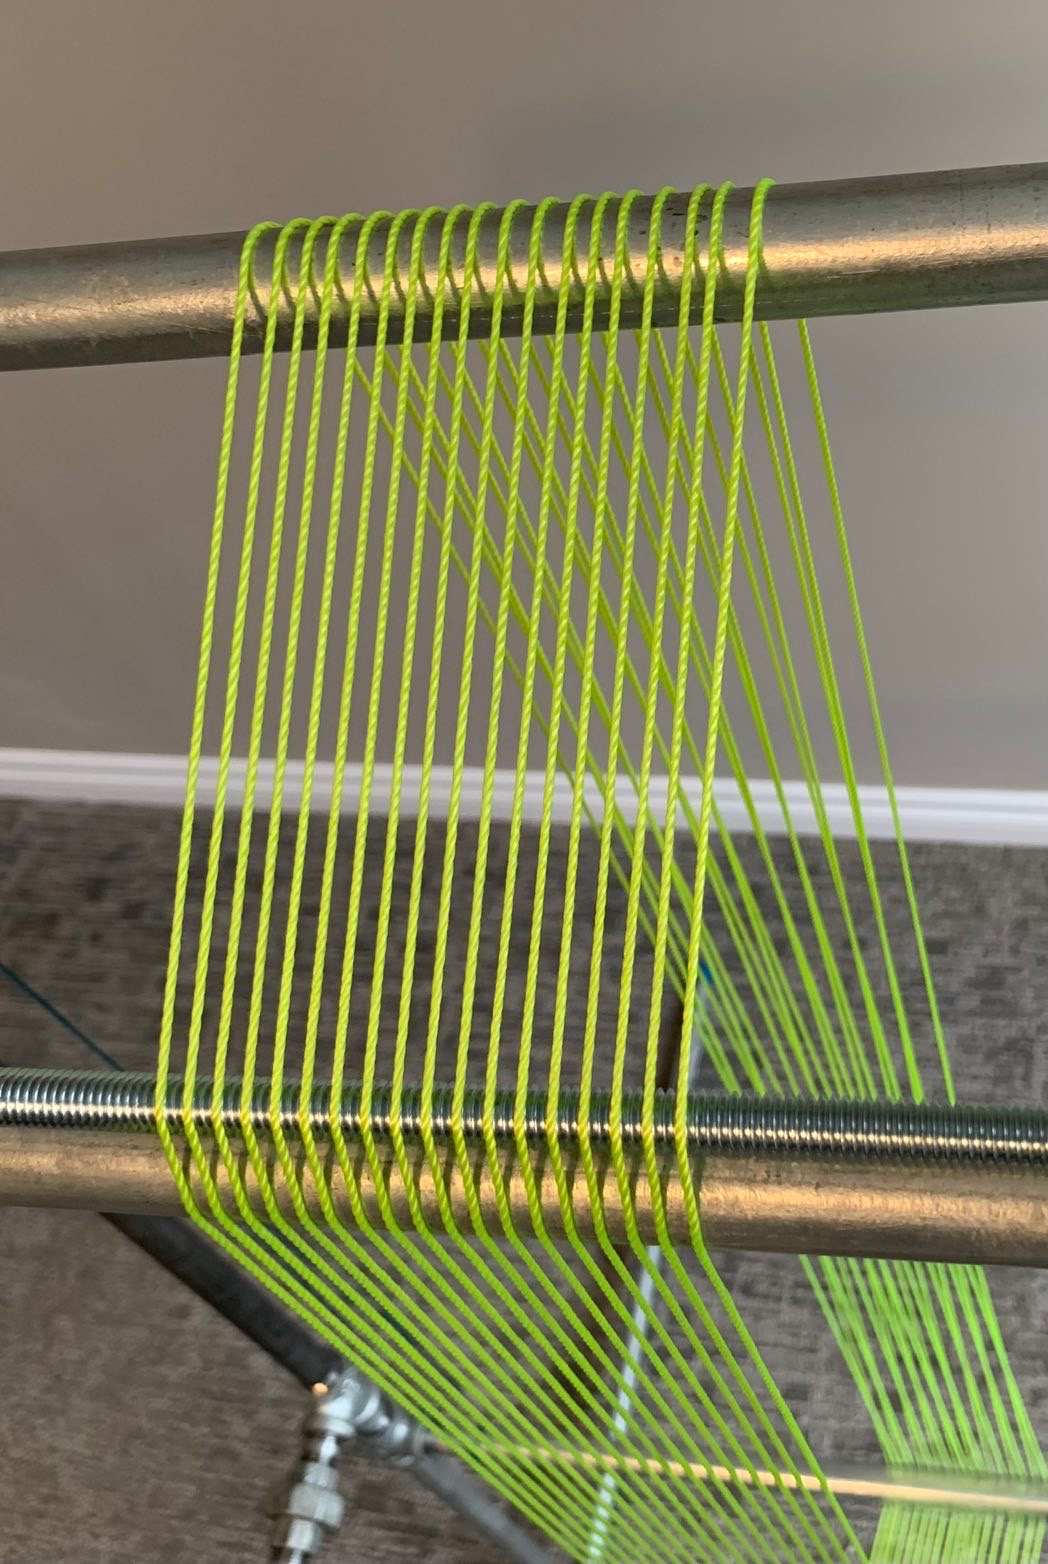
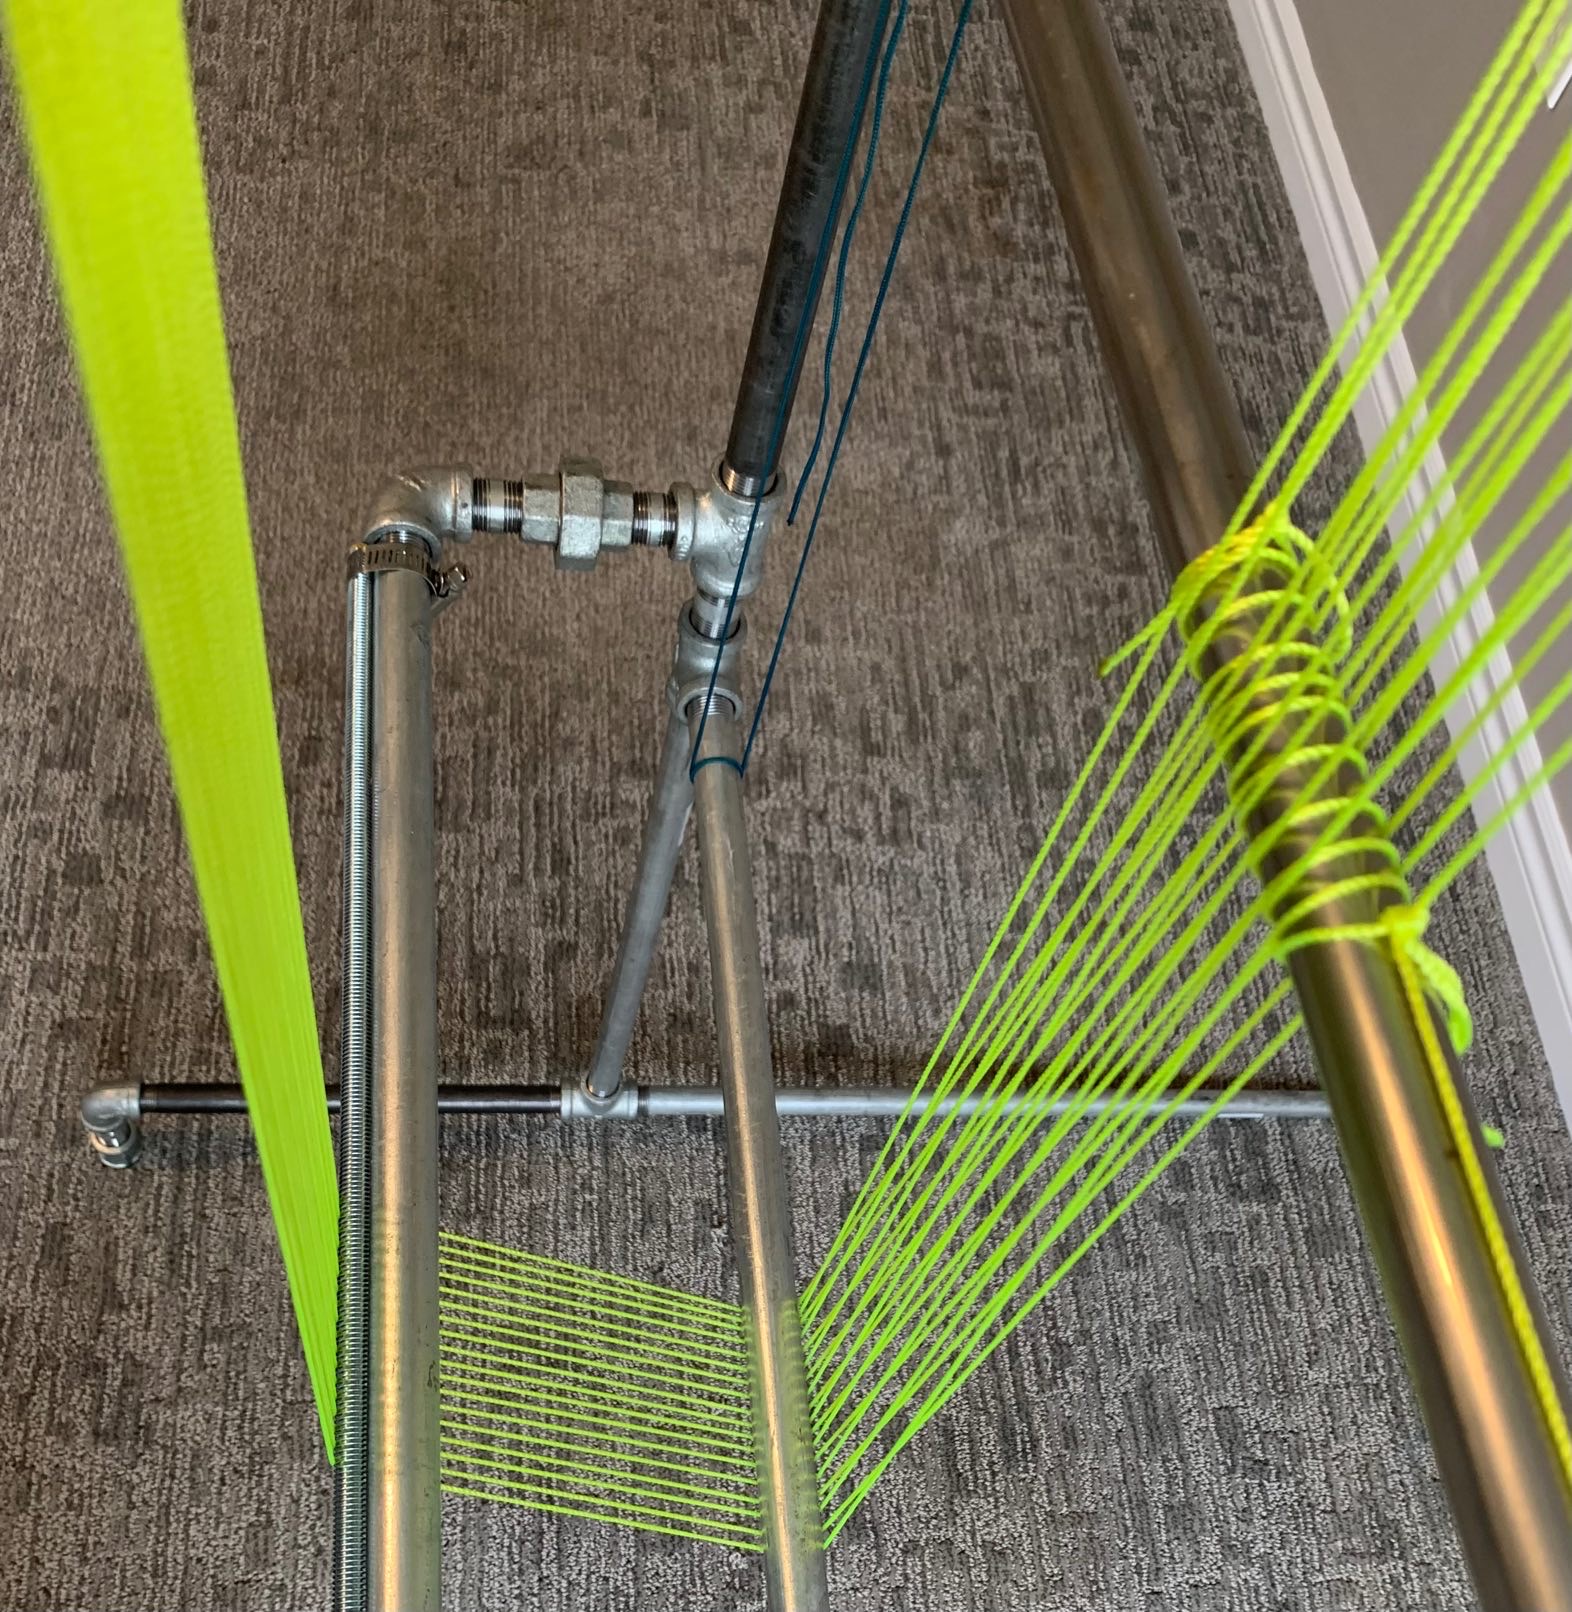
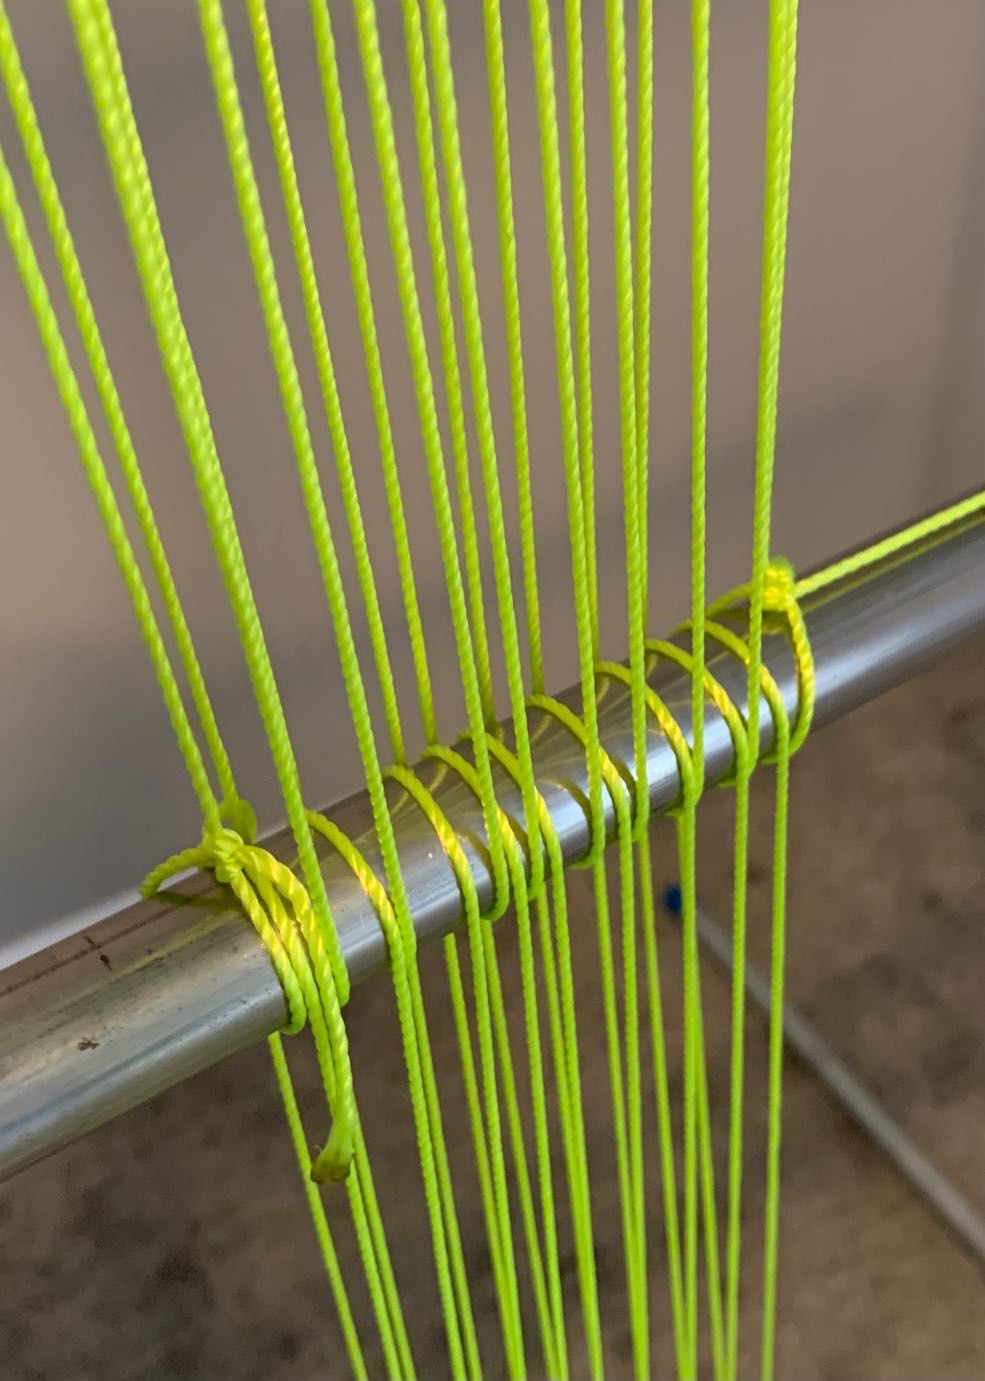
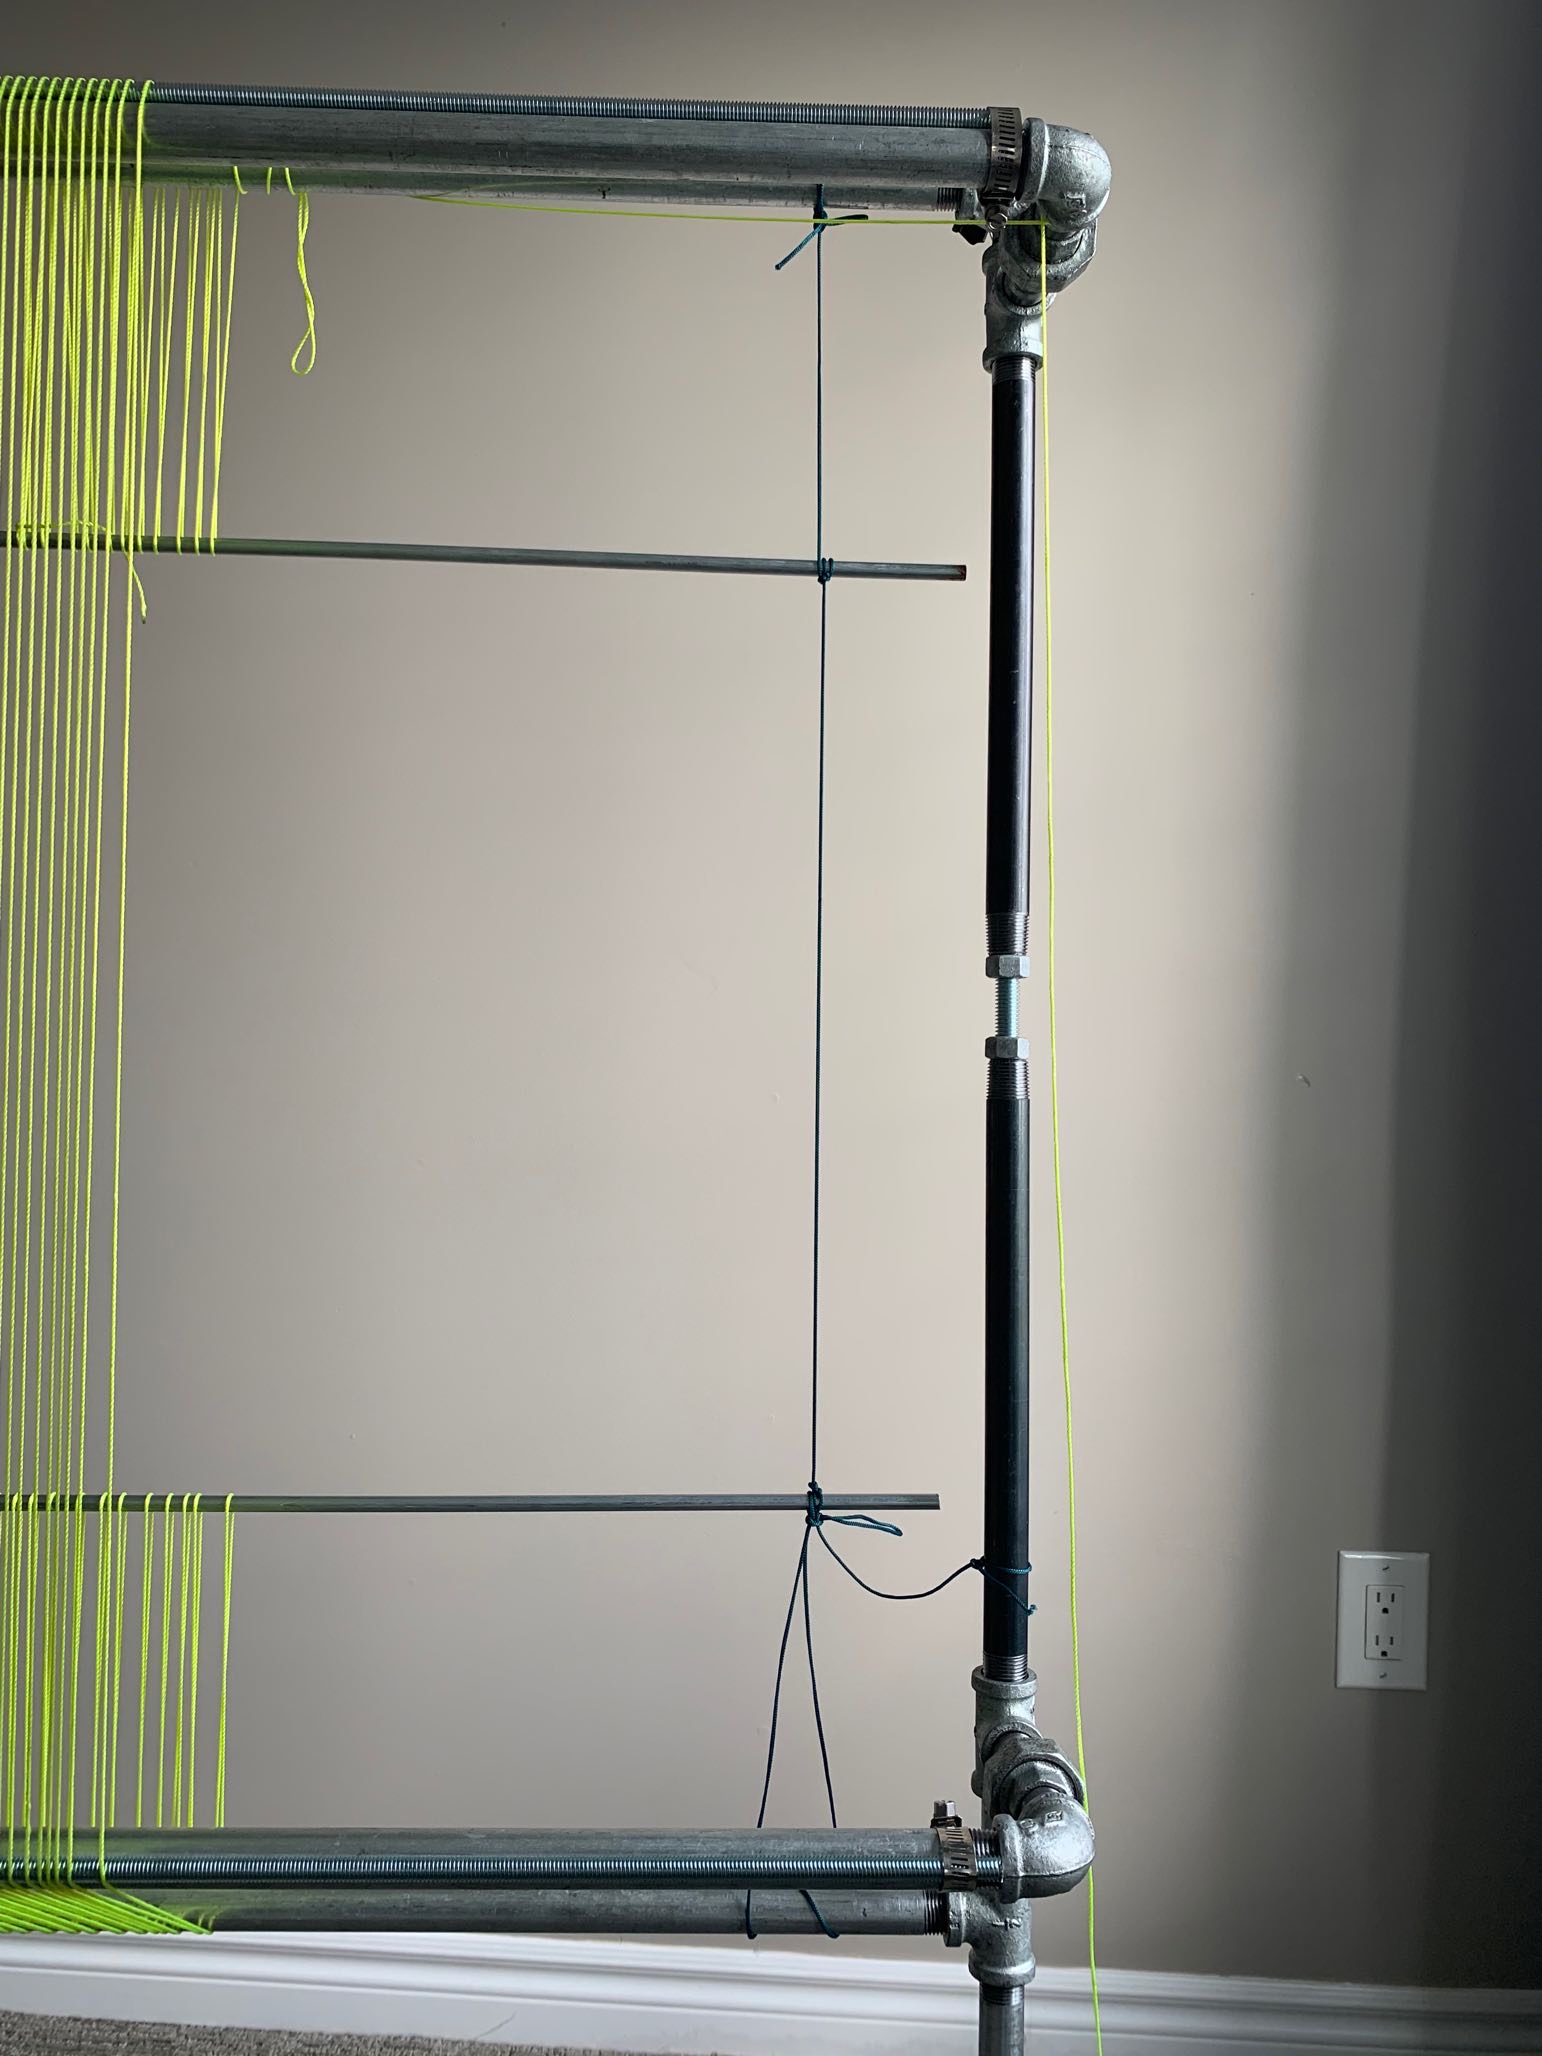
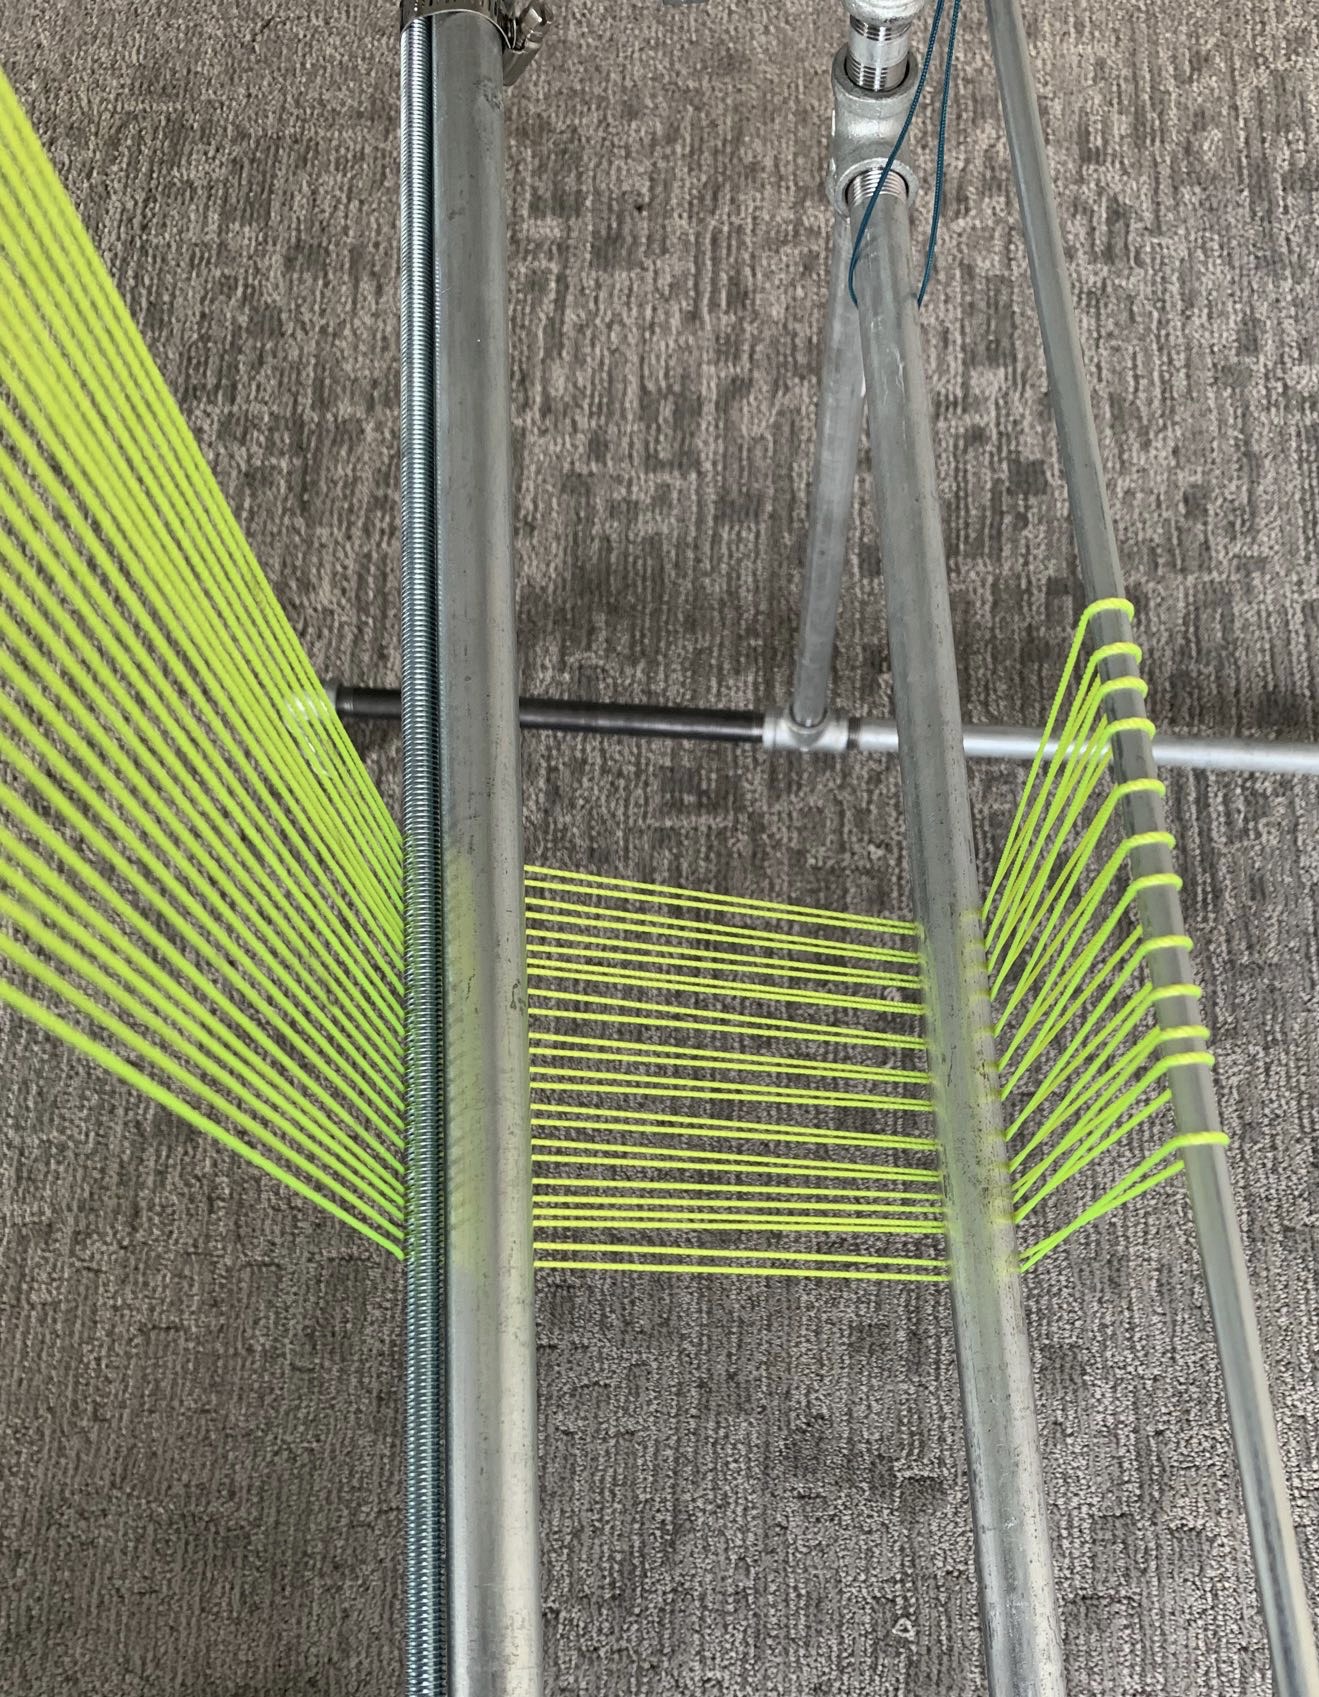
Bead weaving requires the use of thinner warp thread that can be hard to keep in place, especially when starting to weave the first few rows. Threaded rods (D) were added to help the warps stay in place exactly where you need them. These rods can be easily removed by loosening the Hose Clamps (E). You will need to remove these threaded rods when advancing your work when you have used the continuous warping method. The reason is that you do not want to damage the beads.
Another modification was the addition of extra space between the front and the back warps, allowing easy access to the back of the warps to push the beads in place so that the weft thread can be passed through with a needle. This was done by adding the extra 2 bars jutting out of the loom body. I LOVE this feature.
This loom is also designed for superior tension control.
I demand a lot from bead looms, and so far this loom keeps tension almost effortlessly.
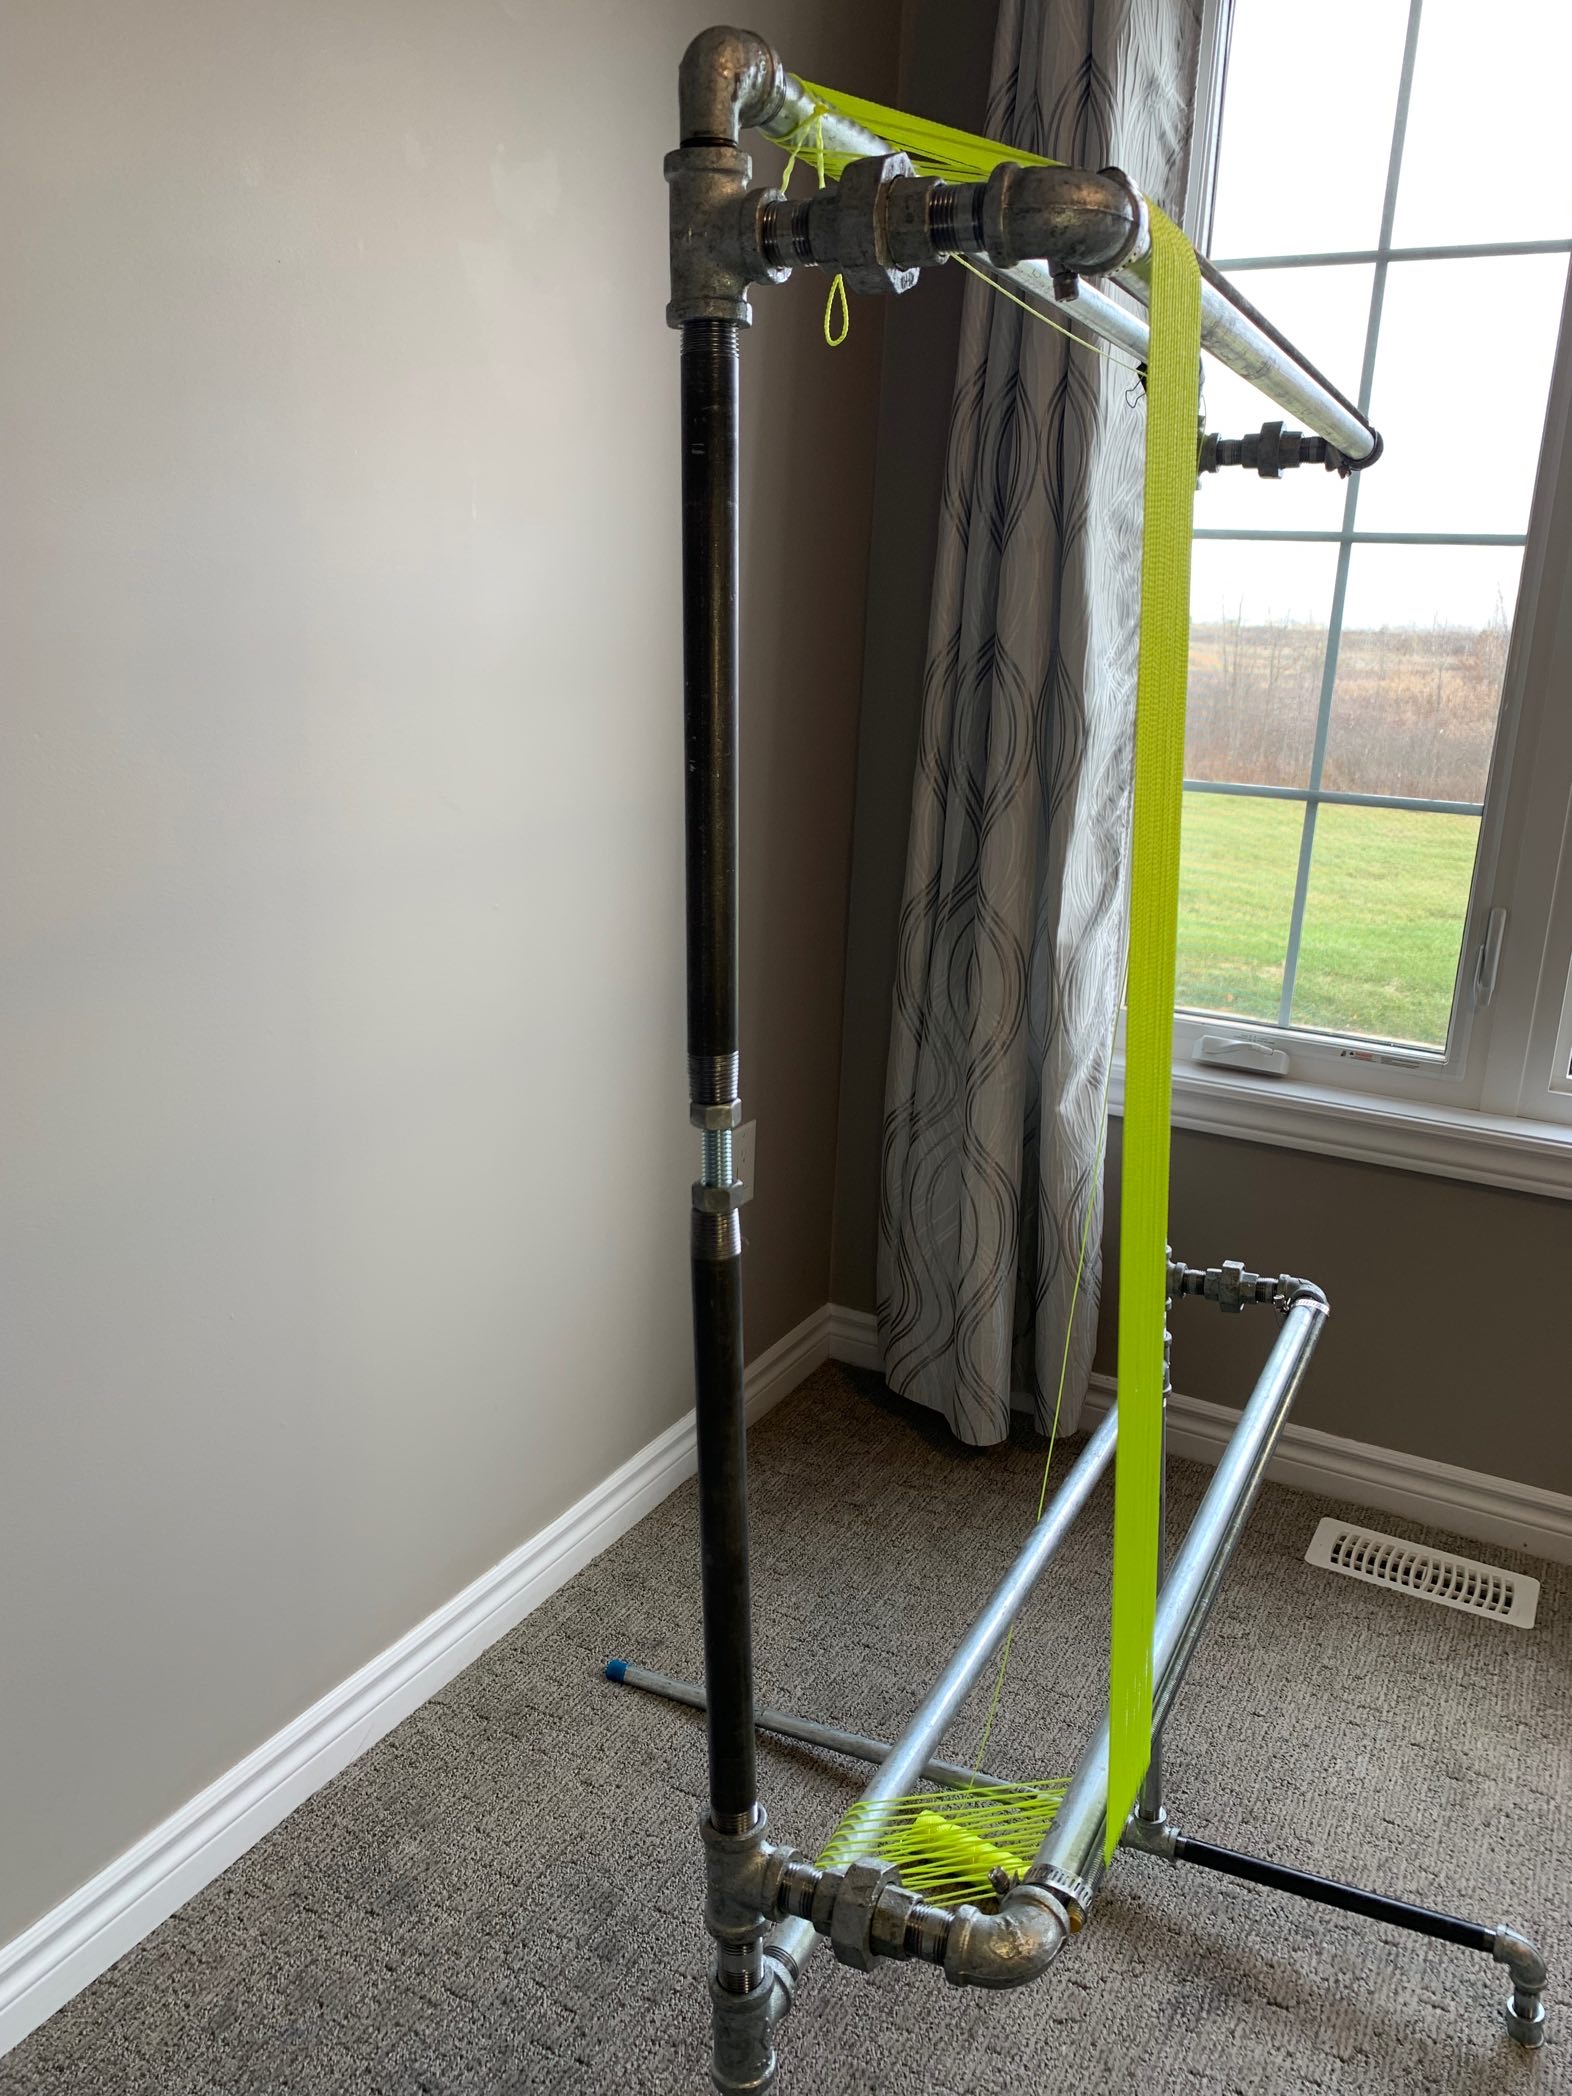
How to Assemble the Loom
Assemble the loom by following the plans in the Bead Pipe Loom Plans.
You will need a heavy plumber’s wrench to tighten the pipes into the fixtures.
Try not to make any marks or grooves into the horizontal pipes, the reason being that the warps will be wrapping around these pipes under tension. If they get stuck in the groove, they will fray and break.
I absolutely know this is unavoidable, so keep reading… there are suggestions on how to fix the groves further along in this post!
Suggestions for Personal Adjustments
For a more Narrow Loom
Swap out the horizontal pipes (C) for shorter pipes!
The threaded pipe lengths that are typically available at hardware stores are 30″, 24″, 18″, 12″, and 6″
The threaded rods will also have to be made narrower to fit the length of the newly installed pipes and may have to be cut to size.
For a Wider Loom
Swap out the horizontal pipes (C) for longer pipes!
Make sure that your threaded rod is long enough. Some threaded rods come already cut to specific sizes depending on the hardware store you are purchasing them from.
For a Shorter Warp Length
Swap out the vertical (A) pipes for a shorter pipe, except for those in the legs of the loom, right at the bottom.
Be sure to adjust the length of the threaded rod for the tensioning mechanism as needed.
For a Longer Warp Length
Swap out the vertical (A) pipes for longer pipes and adjust the threaded rod as needed.
Please note though, increasing the length of the loom will likely cause it to become top-heavy. And so, it is a good idea to make the legs or the stand of the loom from 1-inch pipes instead of 1/2 pipes.
Replacing the Nuts with Wing Nuts
Swapping out the Hex Nuts (G) for wing nuts is simply a matter of preference.
I don’t like my weft thread getting caught on anything when I am weaving, and I tend to use the sides of the loom for other things while weaving. For me, the wing nuts will be in the way, so I have designed my loom with hex nuts. If that is not an issue for you and you would prefer not to use a wrench every time you need to loosen or tighten your tension, then replace the hex nuts with wing nuts! Just bear in mind you can tighten the warps so much more with the hex nuts and the wrench option.
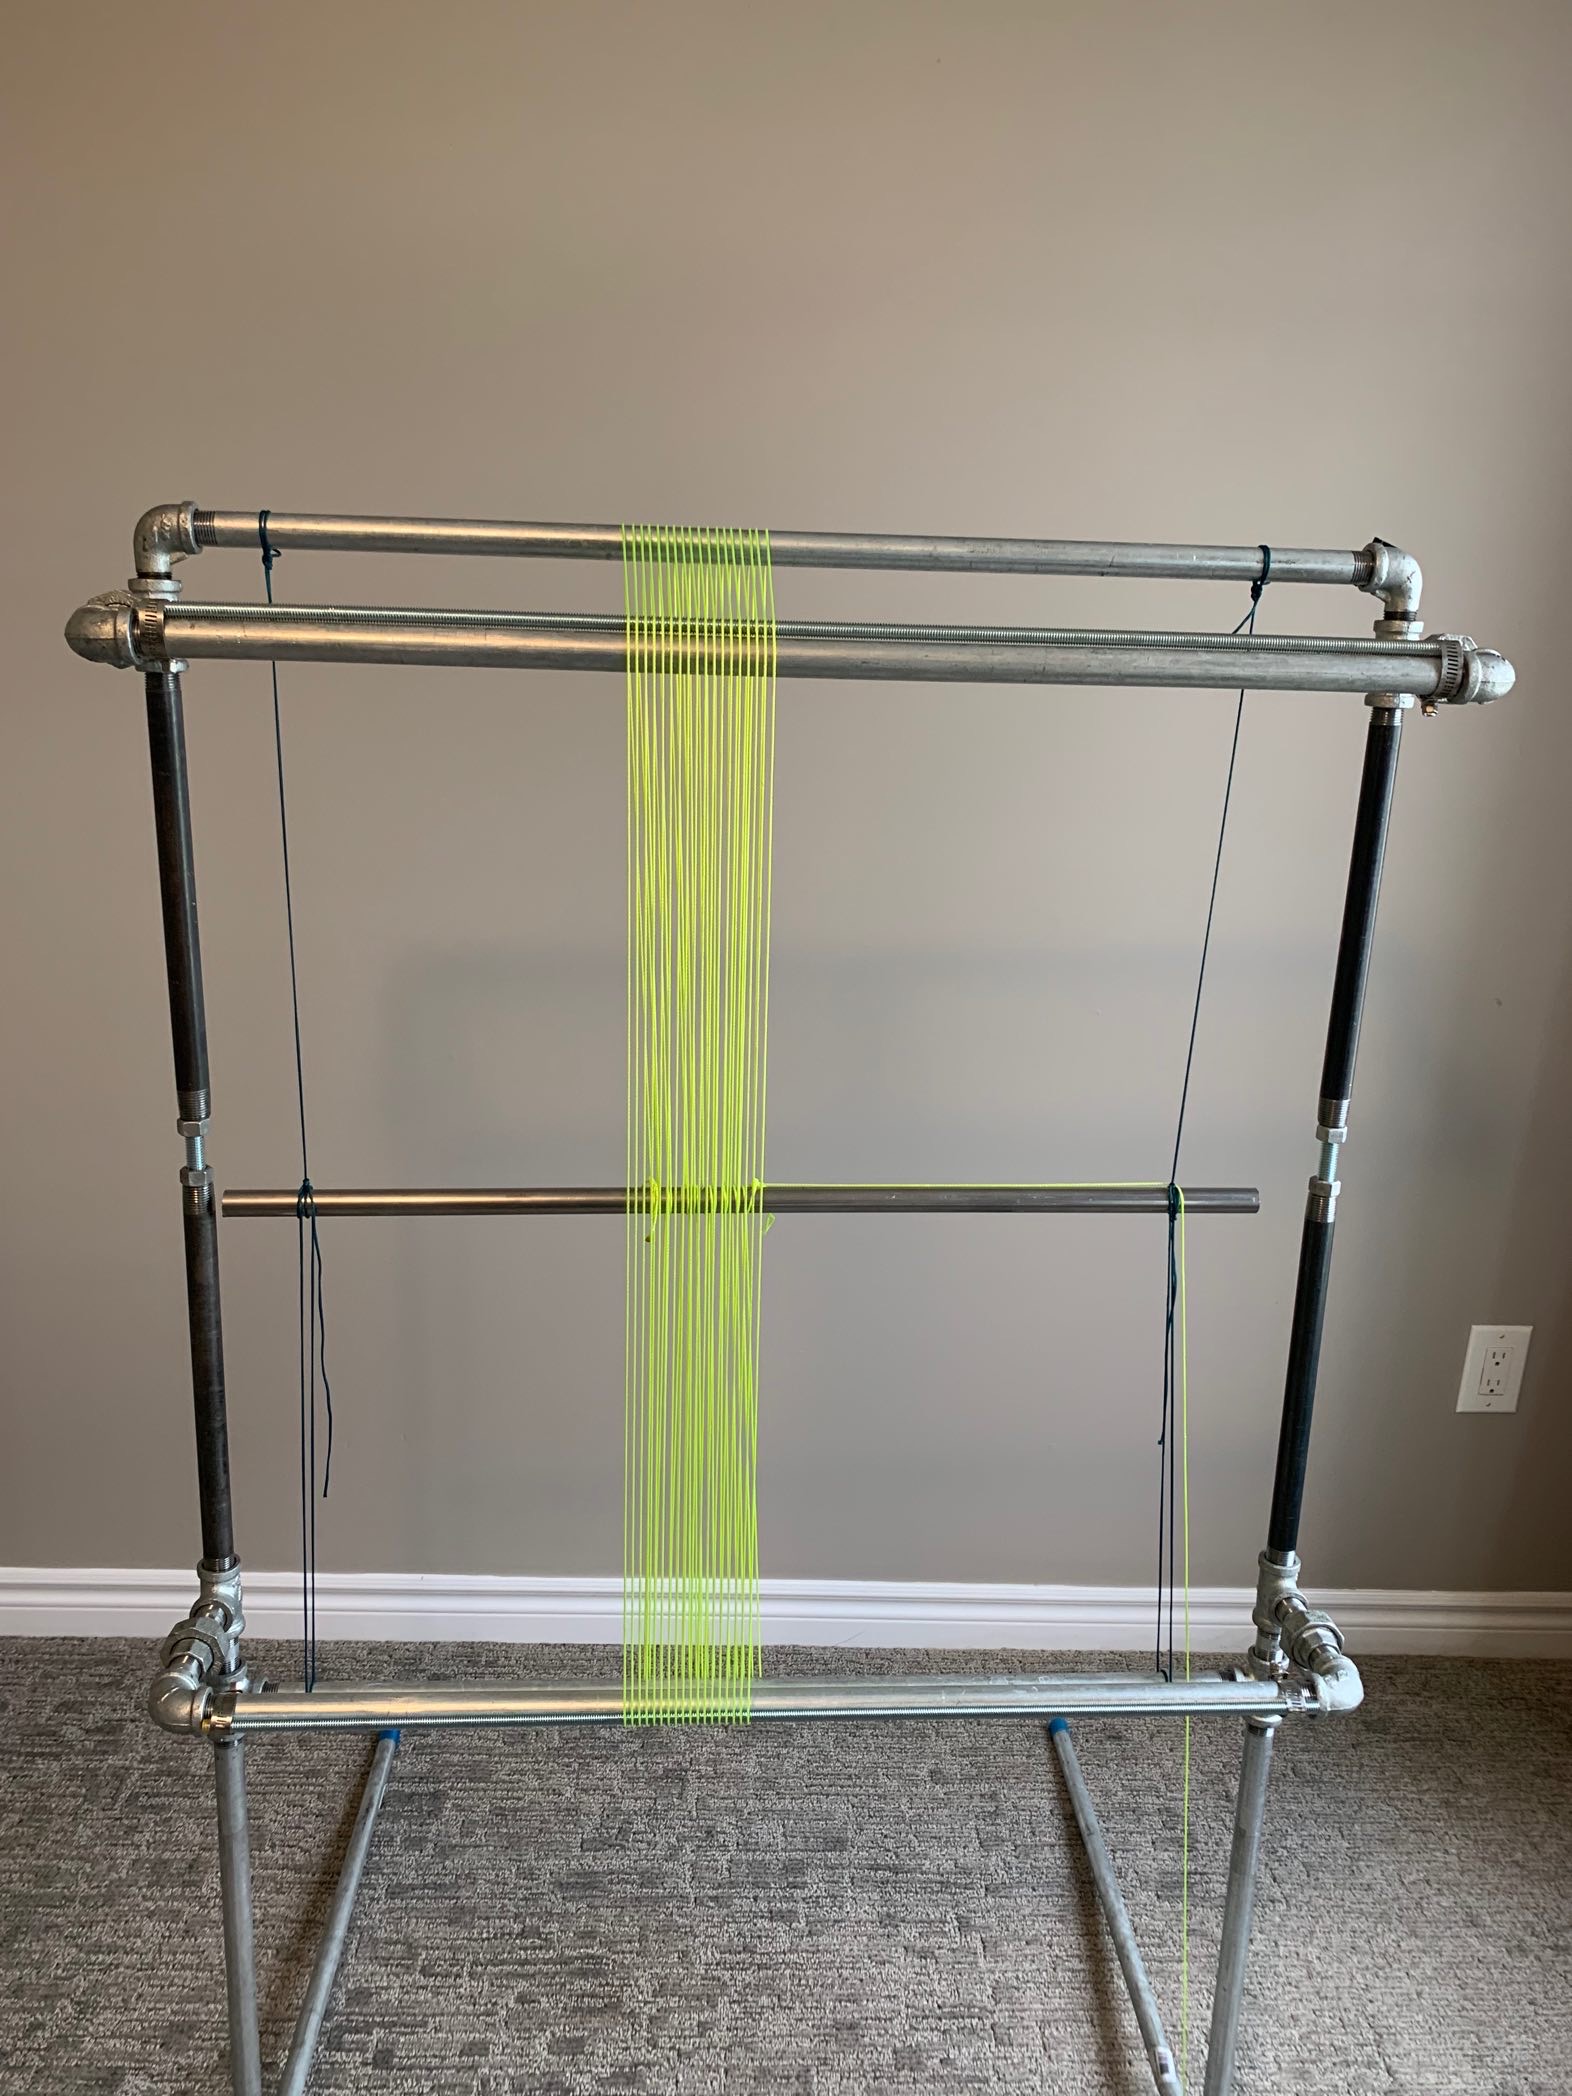
Warping Techniques
There are several warping techniques that you can use when weaving on this loom.
Traditional Bead Weaving Technique
I hear you saying… but there are no pegs to warp this loom!!
True, no pegs in sight, but you can wrap them around the top bar and the bottom bar instead!
Nothing too complicated, just as you would wrap the warp threads all from the same side around the peg, in this case, you will be wrapping the warp thread around the bar.
Wrap the around the outside of the loom
Under the top or bottom bar
Back over the top or front bar making sure the warp is in the correct position on the spacer bar.
Here is the most exciting part.
If warping with pegs is your favorite method, then drill some holes in the back of the top and bottom back bars. These holes will enable you to add screws or golf pegs (Tee pegs).
For stability, make sure that the holes are the smallest size possible, especially if you are drilling a large number of them.
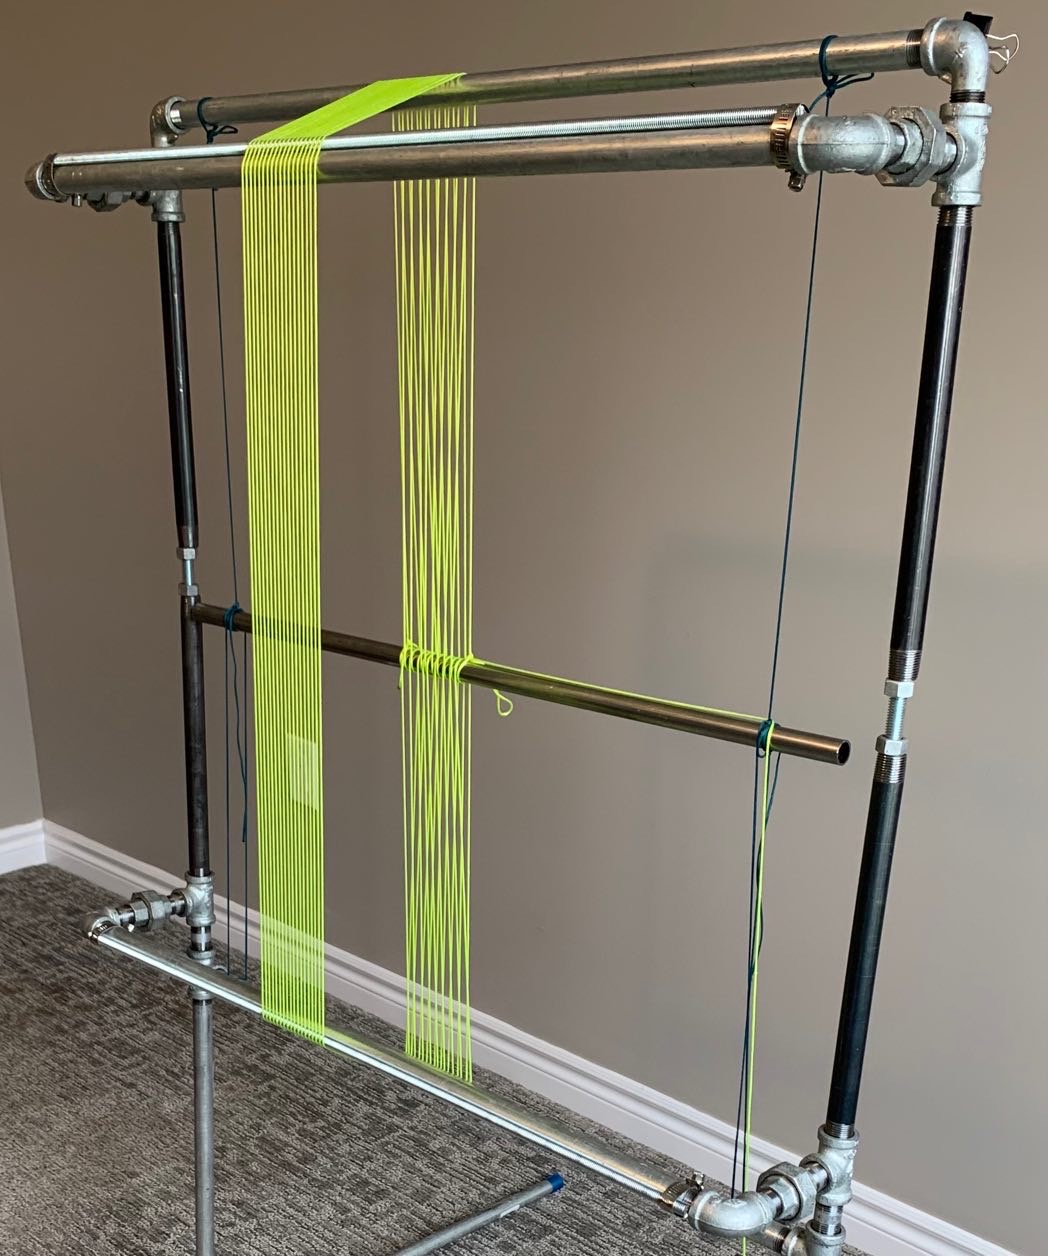
Continuous Warping Method
The continuous warping method is also used in fiber tapestry weaving, where the wrapped around a warping bar, allows you to move the tapestry towards the back of the loom. This means that you can adjust the position of the tapestry to a position that is comfortable to work from, which makes this my favorite warping method.
I can hear you say…
Continuous warping method?
With this loom?
At this warp length?
The answer to all these questions is yes, and no.
No warp thread is wasted in the way that I will be using it.
A bit confusing I know. This is another blog post in itself, I will link to it here when I write it up!
This method is a bit harder to wrap your mind around, as it involves some spacial reasoning. But if you keep in mind that the warp bar is just a long sideways peg with both sides wrapped around it then it makes it a bit easier to grasp.
Continuous Warping Method with 2 warping rods
This method can be used when using the continuous warping method but wanting to save on warp thread. It is not more difficult than using one warping rod, setting up for warping is more involved though.
The two warping bars are tied in place on the loom and then tied together. This second tie that ties them together is not removed until the piece comes off the loom.
The warping of the loom is then similar to warping with the continuous method.

Weaving Horizontally
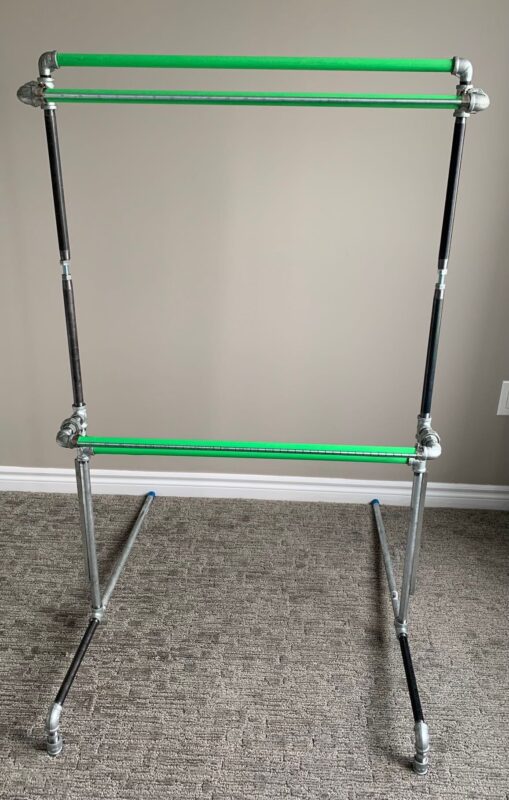
If you prefer to weave with the loom laying flat horizontally on a table, then simply omit the stand and lay the loom on any horizontal surface.
Because it has a bit more weight to it, it will stay in place.
The continuous weaving method can still be used to keep the Fell Line… last line of weaving… easily within reach, making weaving more enjoyable.
Tips and Tricks
Smooth out the Groves
When using the heavy plumber’s wrench to assemble the loom, make sure that the dimensions of height and width match, it is inevitable that the plumber’s wrench will leave marks or grooves in the pipe. There is only an issue if the warp threads touch the grooves on the horizontal pipes (C).
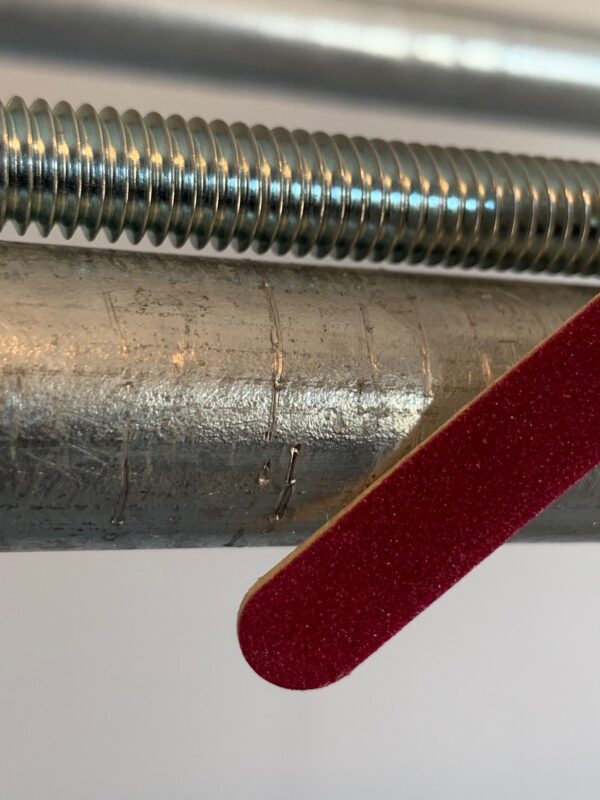
Check those pipes by running your fingers along them feeling for the grooves and then…
I use a disposable nail file for this, but you can use any fine grit sandpaper…
File the groove down bit by bit, feeling for smoothness with your finger as you go.
Grooves are too Deep
So you have been sanding and smoothing those grooves and they are still there to the point where your warps are likely to get stuck and become frayed. You can use some clear nail polish and fill it in or even some superglue, just a tiny bit, and file or sand it again. The nail polish may need to be reapplied at a later stage as it tends to flake off.
If that does not work, then another alternative is to patch it with a piece of sticky tape.
Cover the Warp Bearing Pipes with Tape
If smoothing out the grooves does not appeal to you or you are a bit concerned that you might miss one (as I was), then you can cover the warp bearing pipes, which are the horizontal ones (C), with painter’s tape or gaffer’s tape.
Gaffer’s tape is more of a thread-based tape and painter’s tape is more of a paper-based tape. I chose painter’s tape. Both work and both should come off the pipe clean and leave no glue residue.
I like that it is a darker color than the pipe, so it provides some contrast when warping, which will help with visibility.
I like that I can make marks on it and then simply replace that section when warping the next project.
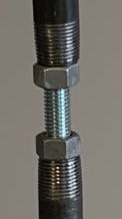
Adjusting the Tension
Make sure when warping the loom that there is some space between the nuts on the Tensioning Mechanism. Otherwise, you will not be able to release enough tension to rotate your work to the back of the loom for example. There need not be as much space as shown here.
A Final Note
The modifications I made to the plans were based on my experience and what I would like my loom to be. Personally, this is what I enjoy most, and allows me to concentrate on my bead looming.
This comes from years of weaving large bead tapestries on the loom.
What does this mean to you?
It gives you a great starting point though as you will not need to work through the trial-and-error process to see what works best.
It opens up a world of bead weaving possibilities that were previously unavailable on smaller bead looms.
For instance, right now I’m working on a 4 salvage warping technique that eliminates the need to finish all the pesky warp ends!
I hope that you will adopt and adapt these plans to create a loom that works best for you.
If you find these plans helpful, please pass the link to the PDF file along to whoever is interested.
https://beadingtreasures.com/diy-bead-tapestry-loom-plan/
I know that I will be making more changes to my loom as I go along on my journey, and I love that I can easily do that by adding or removing plumbing pipes and fixtures and that it only takes a trip to my local hardware store!
And I promise that when I do make changes I will share them.
Will you share your looms plans and modifications with us too?
Please send a photo of your loom to nedal@beadingtreasures.com
If you enjoyed this post…
You might also like to read these posts too:
lATEST POSTS

Best Thread Color to Use with your Patterns
What is the best thread and thread color to use for weaving your bead tapestry?
Dec

Best Way to Weigh Your Beads
How best to go about weighing the beads in your stash before purchasing more for[...]
Dec

How BT is Helping You to Weave Large Bead Loom Tapestries
All things beading, bead looming large tapestries and digital planning for beaders.
Mar

Hi there ! I’m Nedal.
I created Beading Treasures to make information about beading large tapestries more accessible, and in doing so encouraging creating of this amazing art form.
Weaving big can seem intimidating but by using some techniques it is totally doable, no more than that it is really enjoyable!
If you’ve found this blog helpful, please support me by choosing the affiliate products on my blog and following me on my social platforms.
Don’t forget to check out the shop.
Thank you!
Nedal Douaihy, Artist & Founder