Nedal's Favorite Things
Nedal’s Favourite Things: Magnets
Follow us on
Estimated reading time: 43 minutes
I like to have everything organized and in its place, while bead weaving on my loom. I tend to work better and faster that way. I allot a specific spot for my tools so that when I need them I can just reach out and grab them and they will always be there waiting for me.
That’s why I love using magnets. They hold things in place and I will find them right where I need them when I need them.
However, if you have a health condition that bars you from using or being around magnets, it goes without saying that they should be considered your enemy.
Please do not use them.
And now… the magnets…
Why Magnets?
Magnets help me stay organized and I can develop a rhythm or a bead-weaving methodology that flows easily. Bead weaving is meditative. Nothing should disturb that process, especially not having to look for tools or items you need, when you need them.
So I have made friends with magnets.
They are my non-intrusive and silent and loyal and trustworthy helpers.
I use magnets to hold many materials & tools in place such as:
- my scissors
- snippers
- pliers
- needles
- markers
- needle threaders
- bead stops
- thread zappers
Basically, anything I need that I don’t want to be rummaging around for… I will stick a tiny magnet on it and stick it to my loom, out of the way. Since the loom that I love and use the most is a Pipe Beading Loom, I can attach magnets to my tools with a glue gun and then have them always within reach.
I really do love’em.
They give me feedback too… a tiny click to let me know that my tool will be there the next time I might need it.
How and Where to Use Magnets
The most obvious… there needs to be something metal (any metal with iron in it) the magnets can attach to. Not to aluminum though… nope… that will not work.
To get around this I’ve been known to attach metal rulers or magnetic knife holders to my loom and my workspace. I have even been known to pry out the magnetic bars from the knife holders … because the knife holders can be too wide.
Find what works best for you, where do you want your tools to be?
I’m right-handed, so my snippers are always attached to the lower right-hand side of my loom.
The tools or Items that I do not use so often, say for example the pliers, I will have them higher up on the right side of my loom.
I should mention here that I weave with my loom being vertical but at an angle, slanted backward.
This might be less of an issue for someone who weaves on a loom lying horizontally on a table.
You could just place it there, right? All your tools will be on the table on a larger surface area and within reach.
Well not me, I have woven horizontally, with my loom laying flat, for which my back and shoulders did not thank me, and I have found that my snippers and other assorted beading necessities seem to travel out of my reach, involuntarily.
Strength of the Magnets
The magnets must be strong enough to hold the weight of whatever you need to attach to it.
If the magnet is weak it will just fall off… and then the aggravation starts!
No biggy… just double up on the magnets or get stronger ones.
I use different kinds of magnets, depending on how strong I need the magnet to be.
Placement
Make sure that the items with magnets attached are out of the path of your weft thread. Mine tend to be to the side and a bit high as I weave bottom up. I tend to use my right side to store more things, as I am right-handed. Except for my needles, I usually have a parking space for them on both sides of my loom, and you guessed it, the needle parking could be attached to the loom by a magnet.
Magnetic Tool
Telescopic Magnets or Magnetic Pickup tool
This is another magnetic helper that saves me the hassle of searching and squinting to find my runaway needles, which needless to say can be very dangerous with pets around and my tendency to be barefoot indoors. Here comes the best part, no need to blindly brandish the magnetic tool….
Behold the Magnetic Telescoping Pick-Up Tool with LED Flash Light
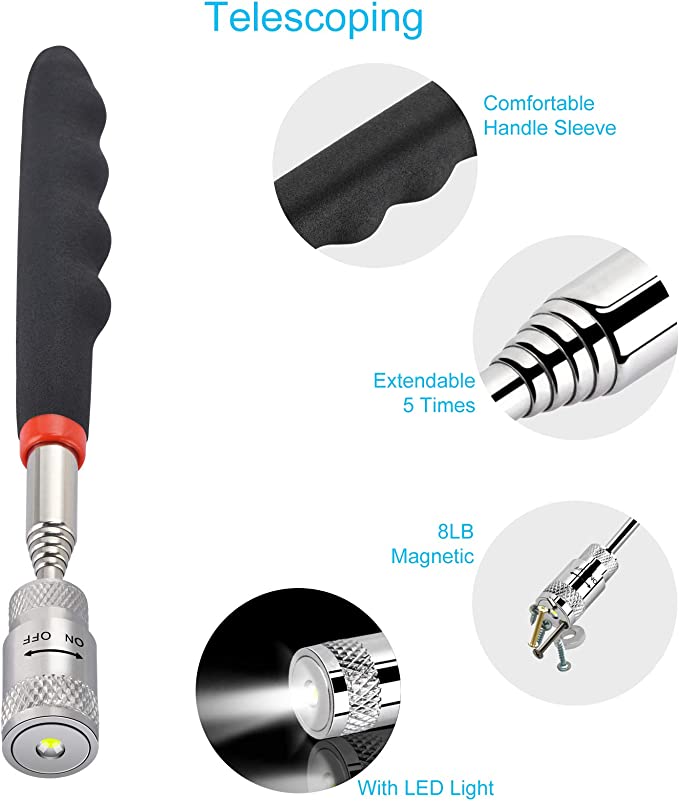
Behold the Magnetic Telescoping Pick-Up Tool with LED Flash Light
Extends up to 31 inches !!!
Here is a link where you can purchase it! Magnetic Telescoping Pickup Tool
While you are there… you might want to check out my other favorite things too!
Extend the pick-up tool, on the flashlight on and search for the needle.
The light should reflect off the shiny metal surface and the needle shall reveal itself.
This really helps if you are fishing in the dark or if your carpet or floor is acting as a camouflage and hiding the AWOL needles. Pull out the telescoping tube and pick up that pesky runaway without leaving your chair and getting down on your hands and knees and looking for it. And since it is magnetic, I can attach it anywhere to my Beading Pipe Loom.
Magnetic tape
I use magnetic tape to make my physical line guide (I use both physical line guides and digital line guides, depending on whether my pattern is printed out or not) for my patterns.
I prefer to make my own line guide, leaving just enough space per line for my pencil and markers to move within the gap and help me mark off when I load the beads onto the weft.
A Printable Line Guide template is available at the Beading Treasures shop, with instructions on how to put it together.
The Magnetic tape is not strong enough to keep your tools in place though
Neodymium Magnets
What are Neodymium Magnets
Neodymium magnets are strong permanent magnets and are part of the Rare-Earth magnet family. They are composed mainly of Neodymium (Nd)… hence the name, Iron (Fe) and Boron (B).
Let’s be honest these magnets are a little more costly than ceramic magnets, but neodymium is way more powerful!
You can use a smaller-sized Neodymium magnet to do the job of a larger, less expensive magnet. Smaller size, less weight, more powerful. That about sums it up.
Nothing Magnetic to Stick a Magnet onto?
I have a few workarounds, depending on the size of your loom and where you want to place things… you have a few options.
A Magnetic Strip
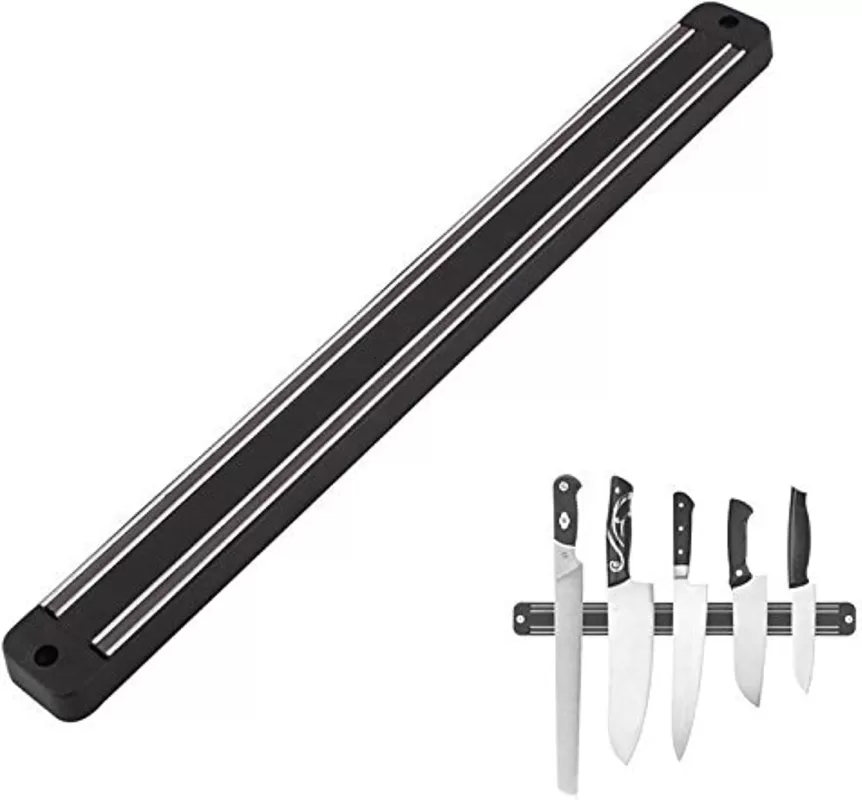
This is very similar to the Magnetic storage bar, the one where you can attach knives in the kitchen or Tools in the workshop. But since we are attaching it to the loom, the lighter the strip is the better. The strip needs to be powerful enough to hold onto your tools.
A Metal Ruler
I’ve been known to glue a metal ruler onto the side of my wooden looms and strategically place magnets where I need them. It is a cheaper option and works like a charm. Might not look as good though, you could always have the side with the markings facing the loom itself and the clean or blank side facing out.
Small Neodymium Magnets
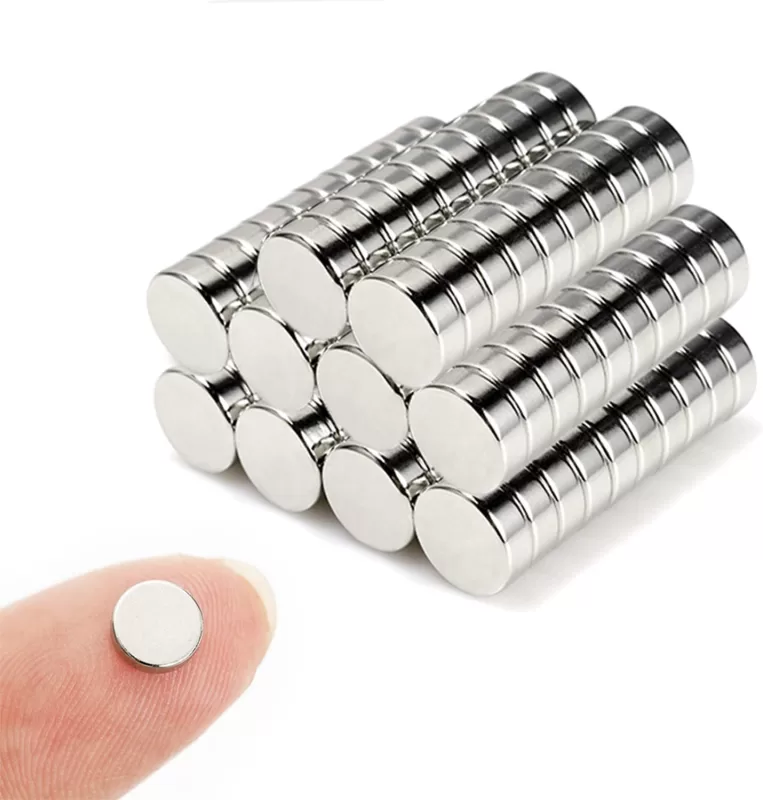
Stick these powerful little things onto any tool you need. These then can be stuck onto anything magnetic nearby, not necessarily your loom.
Where to get Magnets from?
Purchasing your magnets
Well, that’s all well and good… but where do I get these magnets from.
Here is the link to the Magnets that I use in my KIT where I list some other of my Favorite Things!
In Short…
Magnets help me stay organized and save me lots of time that I would otherwise waste looking for things that have gone AWOL. I just love them.
Please do not use magnets if you have a condition that prohibits you from doing so.
I’m sure you have other creative solutions that you have found instead.
If so, please share !!!
If you enjoyed these posts…
If you enjoyed this post, you might also like to read these posts too:
lATEST POSTS
Best Thread Color to Use with your Patterns
What is the best thread and thread color to use for weaving your bead tapestry?
Dec
Best Way to Weigh Your Beads
How best to go about weighing the beads in your stash before purchasing more for[...]
Dec
How BT is Helping You to Weave Large Bead Loom Tapestries
All things beading, bead looming large tapestries and digital planning for beaders.
Mar
Hi there! I’m Nedal.
I created Beaded Treasures to make information about beading large tapestries more accessible, and in doing so encouraging creating of this amazing art form.
Weaving big can seem intimidating but by using some techniques it is totally doable, no more than that it is really enjoyable!
If you’ve found this blog helpful, please support me by choosing the affiliate products on my blog and following me on my social platforms.
Don’t forget to check out the shop.
Thank you!
Nedal Douaihy, Artist & Founder


