Informative, Line Guides, Pattern Planners
Beading Patterns: Printouts or Digital? Which is best for you?
Follow us on
Whether you are new to bead weaving or an experienced weaver, you quickly develop a methodology for organizing your beads, beading tray or board, and reading your pattern. There is no right or wrong way to do this, let me rephrase that, there is a right way to do this. It is the way you are most comfortable with, which makes sense to you, and which works for you and not against you.
This article pertains specifically to patterns, bead loom weaving patterns to be specific, but the principles and the methods can be applied to other forms of bead weaving and extend to other forms of beadwork and artwork as well.
Printed Patterns
Black and White or in Color?
At Beading Treasures we always offer both formats for every pattern.
Most beaders print their patterns themselves and most of the time they choose black and white because of the sheer amount of ink it requires to print them in color. And even when printed in color, the printed pattern does not represent the true color value of the bead. What we see on the screen is never really the same as what is printed, even when it is professionally printed.
Here is why. Screen color values, which all beading and other design software use in their color palettes are in RGB (Red, Blue, and Green colors which are combined to make an array of colors). When printing, the printing functions take that RGB value and convert it into CMYK.
CMYK (Cyan, Magenta, Yellow, Key/Black) is the color format used for printed materials. Think of the cartridges in a printer. The printer does not have Red, blue, and green cartridges, rather it has blue/cyan, magenta/purple pink, yellow, and black.
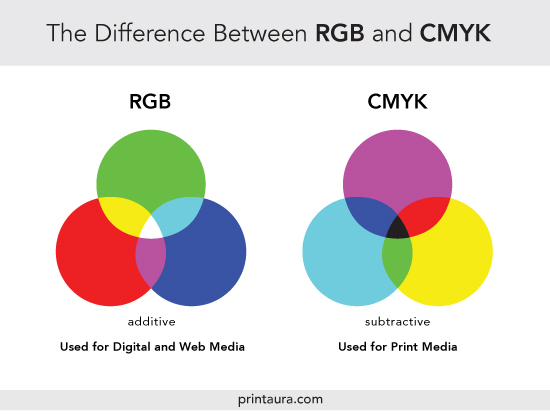
What the printer does is, creates images by combining CMYK colors in different degrees with physical ink. This is called subtractive mixing, which basically means that all colors start as white, and each layer of ink reduces the initial brightness of the white to create the desired color.
What this ultimately means is, the color sometimes gets a little lost in the translation, and so printed patterns do not have true to-pattern color representation.
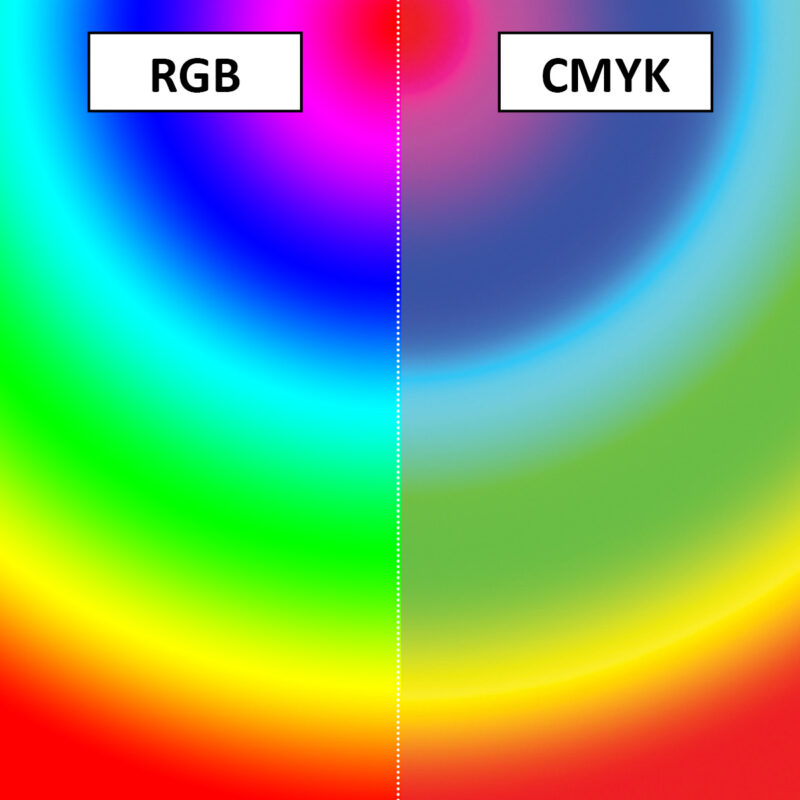
All this combined with the fact the bead colors in the design itself (Digital Pattern), are not an absolutely true representation of the actual bead color because of the different types and finishes of the beads, making the printed pattern an even less accurate rendition.
Grid or Wordchart and their pages
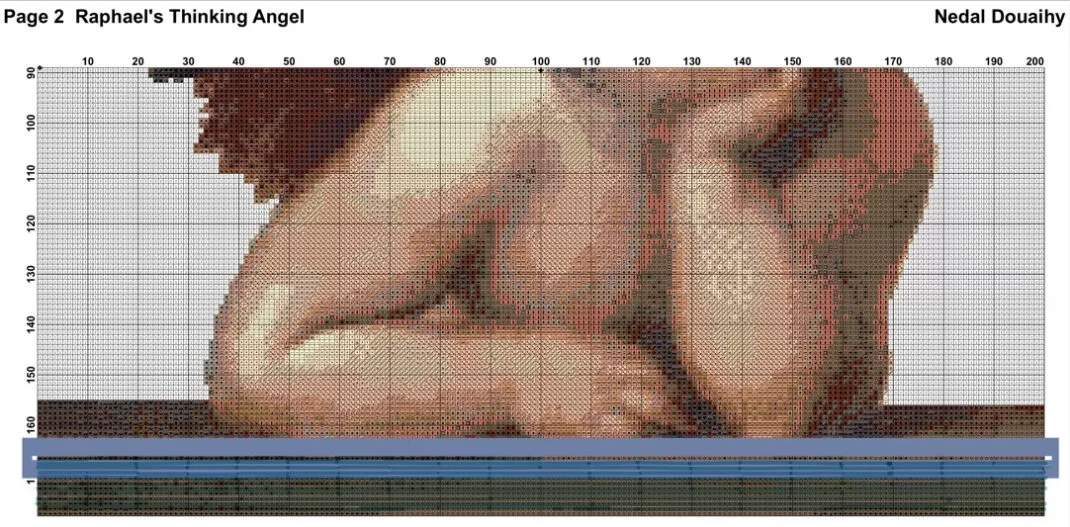
Whether you print your grid or wordchart, if it is a large tapestry, the pattern will span over several pages, with wordcharts taking up more pages than the grid format. These sample pages were taken from the Golden Rose loom pattern.
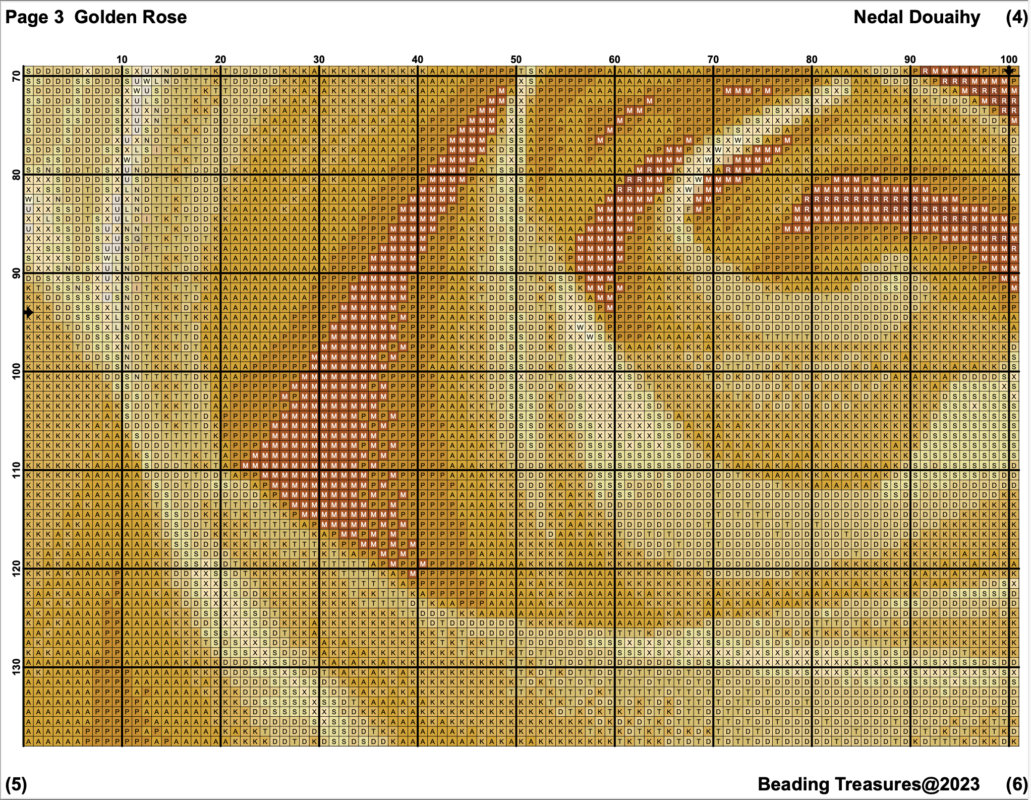
The pattern in Grid Format.
This is a sample of a pattern in a grid format. The whole tapestry pattern will span over 6 pages.
As a frame of reference, this tapestry is 200 beads across or wide and 188 beads or rows high.
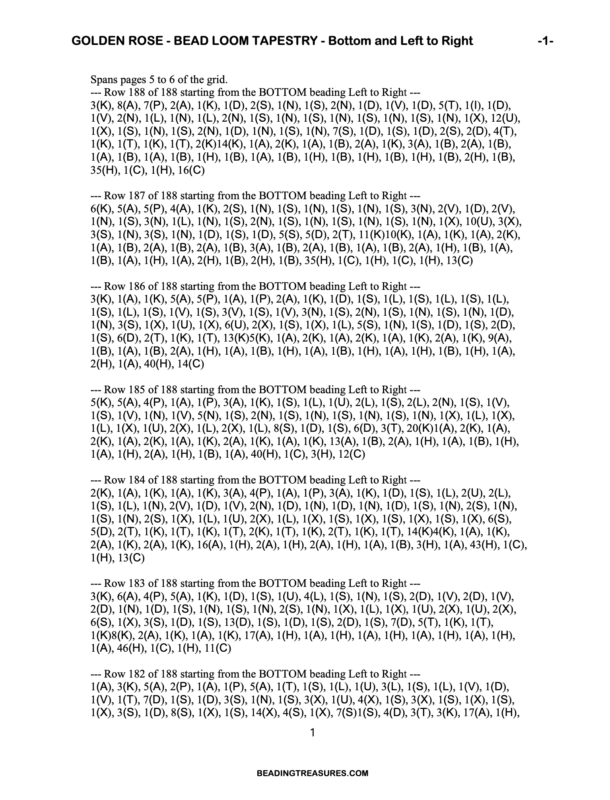
The pattern in Worchart Format
This is a sample page of a wordchart for the same pattern as above “Golden Rose”. The wordchart for the same pattern will span over 28 pages. And is typically in black and white for maximum visibility of the letters or symbols used in the pattern.
Organizing Pages
Weaving larger tapestries means more pattern pages whether it is in grid form or word chart form. Actually, wordcharts will always have more pages than grid charts and the pages are sequential, which means less organizing of the pages is needed. Grid chart will need to be organized according to your beading methodology, for example if you start weaving from the bottom to the top, you will be using the last pages of the pattern.
Every bead loom weaver weaves differently, some start at the bottom, as previouly mentioned and some at the top, some on the right, and some on the left.
So the printed pages need to be organized according to the weaving method and or direction. Sometimes that can get confusing. Our patterns come with a page map allowing you to map out your grid pages.
To further help with that I have made a “Setting up for Beading Digital Planner” for both printed patterns and digital patterns. It helps you get organized for beading your tapestries, recording all the information you need, all in one place.
Using Printed Patterns with Stands
Most bead tapestry weavers work from a pattern that is spread flat on a working surface, because of the size of the printed pattern. Working this way means one needs to lean forward to read the pattern, which could lead to back and neck pain, speaking from experience. Hence the stands. There are numerous stands that can be purchased to hold your patterns, they are mostly document-holding stands.
I have made and used a stand out of plexiglass to tape the pattern on and insulation foam for a base, this can be as wide as 3 A4 papers in landscape orientation. That is 89.1 cm or 35.1 Inches!
The problem with the larger stands is that the line guides need to be wider as well. Since the line guides are usually attached at the sides of the stand, they tend to get floppy in the middle. Another issue with the larger stands is that they need to be properly balanced so that when you mark your progress on the grid the whole thing will not tumble backward.
Using Printed Patterns with Printable Line Guides
The Printable Line Guide is available in the shop. It is essentially a physical version of the Digital Line Guides, a series of templates in different sizes (Small, Medium & Large) for you to use to make your own line guides. You can make your own Line Guide in Transparent or Opaque format.
However. when making the physical line guide long enough to span the width of several pages, the line guide is harder to keep in place. It will become floppy towards the middle.
This can be remedied by making the line guide magnetic by attaching magnetic strips to the back of it. It will have to be used with a magnetic board, or a magnetic sheet and be taped to the stand, and cannot be transparent as the magnetic strips themselves are not transparent.
Size of the Grid & Joining Pages Together
It goes without saying that when the grid spans over several pages, for ease of use, the papers will need to be taped together. This makes the pattern awkward to use unless it is used with a line guide and a board or something to support the pattern. Even then there is the issue of physical space and the placement of the grid.
Printable Line guide
If you would prefer to use printed patterns, I have you covered, I have used them for more than a decade and so I have developed something called the Printable Line Guide. A template that you can use to create your very own line guide, which you can use in a number of ways, on a magnetic board or with a clipboard are just examples. All that is covered in another post coming soon, sign up for the newsletter to know when!
Digital Patterns
What do you need to use them?
Digital patterns are essentially PDF files, and they can be used with any app that can read and display PDF files. In order to mark your progress on the patterns, or make notes, you need a PDF markup or annotation app. The best one that I recommend for IOS is Goodnotes, and it works on all IOS devices. A free version of the app is available and allows only 3 PDF documents to be imported and used. It is now available on Android and Windows (Although I have not tested these versions)
For Windows and Android devices, there is the Xodo app, it is a bit more fiddly than Goodnotes but it does the job well.
How do they differ from Printed patterns?
Marking off in markup apps, do I need a fancy stylus?
The short answer is no. You can use any generic stylus with Goodnotes and Xodo. For Goodnotes it will need to be an Apple Pencil dupe, for Xodo any stylus will do. It will be a bit more challenging to set the line guide to the size of the row for the pattern, but that needs only to be done once per pattern.
GoodNotes or Xodo
If you are using an IOS device, I think Goodnotes is a better option, it has more features for magnification and it is easier to use.
Xodo works well and can be used on any Android and Windows device as well as IOS devices.
Zooming in capabilities
With the Digital patterns, you can zoom in, as much as you like and in color to better see your pattern. You can even use your phone to do your beadwork and if it is too small to see, mirror the screen or cast it to a larger screen where you can better see your pattern.
Of course, you will need high-quality patterns in pdf format, and not images imported into your markup apps. These will always look grainy when you zoom in.
Digital line guide for keeping track
The Digital Line Guide or DLG is the digital version of a physical line guide or reader. I developed it to help me keep track while I am reading my pattern and loading my beads onto the weft thread. It works in both GoodNotes and Xodo. It comes in 3 sizes to match the size of the rows in your patterns and the text in your wordchart. They come in 2 formats, opaque and transparent, and are only available at Beading Treasures. Read more about the DLGs.
Duplicate and use a copy
With digital patterns, you can easily make as many copies of your pattern as you wish, with no extra expense and less of a physical footprint.
Syncing across devices
You can have your pattern, with your progress and notes marked, on any of your devices and at any time.
Save money on printing
No more going to the printers to have your patterns professionally enlarged and printed in color to help with visibility. Along with saving money, you will also be saving on time and effort as you can start with your beadwork faster by skipping this annoying and expensive step.
Self-lit
Having your pattern on a device means that it is always well-lit, it can be made as bright as you wish by increasing the brightness of your device’s screen.
No shuffling papers
You will not need to deal with a lot of printed paper, especially in the case of word charts, and have to always keep them in order. The larger the tapestry, the more pages to print and keep in order. Sometimes this can be helped by decreasing the size of the font on the wordcharts, but then you will have the problem of visibility.
Can use any stylus
Do you really need a fancy stylus to use GoodNotes or Xodo with your digital patterns?
The answer is no. You can use a generic and basic stylus to mark your progress on your grids and wordcharts to start off with.
More true color representation.
Using a digital grid pattern means you will be working from a color version of your pattern. This is especially great for visual learners, as faster associations are made between the color and the symbol on the grid pattern itself and the beads that need to be loaded onto your weft thread with your needle.
Less physical footprint
I like to keep all my patterns, all of them. Even those ones that I have already woven, as I write notes in the margins as I weave. Keeping all of those papers takes up space, space that I would rather fill up with other things, namely beads! Using digital patterns means that I do not have to deal with space issues!
Organize with a Pattern Planner
The Pattern Planner was created to replace the physical binders or folders which are used to keep physical patterns organized.
There are several advantages to using a Pattern Planner, but that is an article in itself.
Here is why I love this planner in brief.
-No need to purchase folders and protective sheets anymore.
-Less physical space is needed to store all of my patterns in all of the planners.
-Can make as many copies of the planner as I wish.
-It comes in both portrait and landscape modes in one product.
-Fully hyperlinked to easily jump to wherever you need to go.
-Fully searchable even your handwritten notes.
-Can use your Pattern from within the Pattern Planner when working on your project.
-Can sort your patterns into categories that can be customized.
-Cover page for every pattern to note important details.
Learning curve
Compared to using paper patterns, yes, there is a learning curve but it is not steep, it is more like an adjusting curve.
Once you start using Digital Patterns with the Digital Line Guide, you will wonder why you haven’t done so before.
Advantages of Digital Patterns
Here is what I noticed while weaving with the Digital Line Guide (in no particular order).
- I made fewer mistakes while loading the beads onto my weft thread
- I not straining to see which bead I need to pick up next
- I was picking up the beads faster because of the color reference and clarity of the symbols
- I could magnify the pattern as much as I needed to
- I could use my finger in a pinch to mark off the beads I loaded on the weft thread.
- No transfer of pencil lead or highlighter onto my hands.
- I saved time by not having to shuffle through papers and organize them according to the way I weave.
- I had the pattern and the color legend with me wherever I went.
Which is best for you?
Only you can know that. Choose what feels right for you, and what is more enjoyable for you.
That is what bead weaving is… a meditative relaxing process.
It forces you to calm down and focus on what you are doing but is also rhythmic.
Choose what fits your rhythm best.
You might already have your methodology which works for you, then stick with it.
Bead weaving should bring you joy.
You have options, switch it up!
Change from digital to printable and back again… there is no rule that says you need to stick with one or the other, especially in the case where the pattern fits on one page and you do not want to carry around an Ipad or Tablet…when you are traveling for example (although I never travel without my iPad!)… you can also use your smartphone. I have a client who has woven a 150 bead wide digitally completely from her cell phone!
In a nutshell
Whatever method you use in your beadwork may change as you gain more experience and develop your own preference. It may also change from project to project and that is ok. Actually, that is great… switching up and changing things around makes your work more interesting!
If you enjoyed this post…
You might also like to read these posts too:
lATEST POSTS
Best Thread Color to Use with your Patterns
What is the best thread and thread color to use for weaving your bead tapestry?
Dec
Best Way to Weigh Your Beads
How best to go about weighing the beads in your stash before purchasing more for[...]
Dec
How BT is Helping You to Weave Large Bead Loom Tapestries
All things beading, bead looming large tapestries and digital planning for beaders.
Mar
Hi there! I’m Nedal.
I created Beading Treasures to make information about beading large tapestries more accessible, and in doing so encouraging creating of this amazing art form.
Weaving big can seem intimidating but by using some techniques it is totally doable, no more than that it is really enjoyable!
If you’ve found this blog helpful, please support me by choosing the affiliate products on my blog and following me on my social platforms.
Don’t forget to check out the shop.
Thank you!
Nedal Douaihy, Artist & Founder

